Back pain prevention is something we do best from stay-at-home moms to advanced athletes. Learn how we can reduce your back pain.

Spinal Disc Health and Hydration Drink Plenty of Water

Spinal Disc Health and Hydration

Your body needs plenty of water to function at its best and the spine is no exception! Unfortunately though, the spine is not able to absorb water as easily as other parts of the body and is instead dependent on the motion of the spinal discs that acts as a pump to move the fluid around. This process is known as imbibition. Imbibition is necessary for the spine to receive essential nutrients.

A normal vertebral disc is close to 90% water. Maintaining this healthy percentage is dependent first of all on drinking plenty of water throughout each day, but it is also dependent on movement. The typical “rule” suggests drinking eight 8 oz glasses of water each day, but this of course increases for those with higher levels of physical activity, particularly when working outdoors in high temperatures. When it comes to movement, leading a sedentary lifestyle can contribute to a loss of water in the vertebral discs and eventually cause disc degeneration and chronic pain. This tends to be particularly common among the elderly as they are no longer able to lead as active of a lifestyle as they once were.

Another important factor that affects spinal hydration is sleep. Each night while you sleep, your body restores some of the water that was lost during the day to the spinal discs, but not all of it. Some have suggested that because of this, it is best to give yourself some time after waking up (about an hour) in the morning before doing any heavy bending so that some of that water in the discs has the chance to disperse. In addition to a good night’s sleep, chiropractic care can of course help improve how your spine functions and feels!

With good hydration, an active lifestyle and regular visits to the chiropractor, you will be taking major strides towards getting your spine healthy!

benefits of water aerobics

The Benefits of Water Aerobics

Water aerobics is an excellent cardiovascular exercise that can help increase flexibility and burn fat. The fact that it is more gentle on the body than most other sports has made it a popular choice among the elderly and those recovering from injuries, but that doesn’t mean that the rest of us can’t benefit from water aerobics as well!

According to the Mayo Clinic, one hour of water aerobics burns “more calories than the equivalent time doing a number of other sports, including downhill skiing, volleyball and weight training.” The specific number of calories burned depends, of course, on a number of factors such as water depth and the intensity of your workout.

Not only is water aerobics a great way to burn calories, but it also helps to build strength. The simple motion of kicking while holding on to the edge of the pool or while using a kickboard is an effective way to strengthen muscle. By exercising in water, your body will feel around 90 percent lighter than normal, which helps make this such a great option for those who suffer from ailments such as chronic back pain and arthritis that make other forms of exercise nearly impossible due to the level of discomfort. Contrary to harsh exercises that can take a toll on the body such as running, water aerobics is a low impact exercise that can actually help increase your flexibility and range of motion.

Do you think water aerobics might be right for you? Talk to your chiropractor to see if it could be a good fit!

whiplash san diego

Chiropractic and Whiplash – San Diego

Whiplash is the medical name for an injury to the neck that is created from a sudden jolt from front to back that creates a whip style movement. Whiplash is more often sustained in motor vehicle accidents; however, it can occur from a fall or sports/work related injury and so forth. The Whiplash injuries are normally due to the result of a sprain-strain to the neck, where the ligaments which provide support, protection and also limit the movement of the vertebrae are damaged. The most commonly injured joints are the facet joints which are located in the back portion of the spine. However, these are usually not the only injuries.

With more severe whiplash injuries tendons and muscles are strained and stretched, vertebral discs can be bulge or herniate, and the nerves may also suffer stretching and become irritated and inflamed. The most common symptoms that are felt with whiplash are stiffness and pain through the neck, generally found in the areas that have sustained damage. Most commonly pain will be in the front and back of the neck and turning the head will make the pain more severe. A headache is also a normal symptom of whiplash. Pain can also be found to extend through the upper part of the body.

In addition to the joint pain, some people experience dizziness, sickness, and even visual problems following a whiplash injury. These symptoms must not be ignored, and medical intervention should be sought if they do not resolve in a day or two. Whiplash symptoms are not always immediate and can take up to two days to appear.

Those suffering from whiplash need to stay active unless they have sustained an injury that requires immobilization. They may be worried but should move as much as possible. The doctor will more than likely prescribe some form of stretching exercises. These exercises are very important to aid recovery.

It is normal to use ice or heat to control the pain and reduce swelling after a whiplash injury. The injured party may also have electrical stimulation or ultrasound if necessary for short term relief. In the case of neck pain, spinal manipulation or spinal mobilization from a chiropractor can provide additional relief.

Debunked Workstation Myths

Debunked Workstation Myths

There are many commonly accepted guidelines for a safe and comfortable workstation that are actually myths. Some postures and furniture can actually harm you and lead to discomfort, if rigidly followed. These debunked workstation myths will help you to manage the health risks of your home or work office:


Debunked Workstation Myths


Myth #1: Sitting correctly at a desk will eliminate discomfort and reduce injuries.

Debunked Workstation Myths
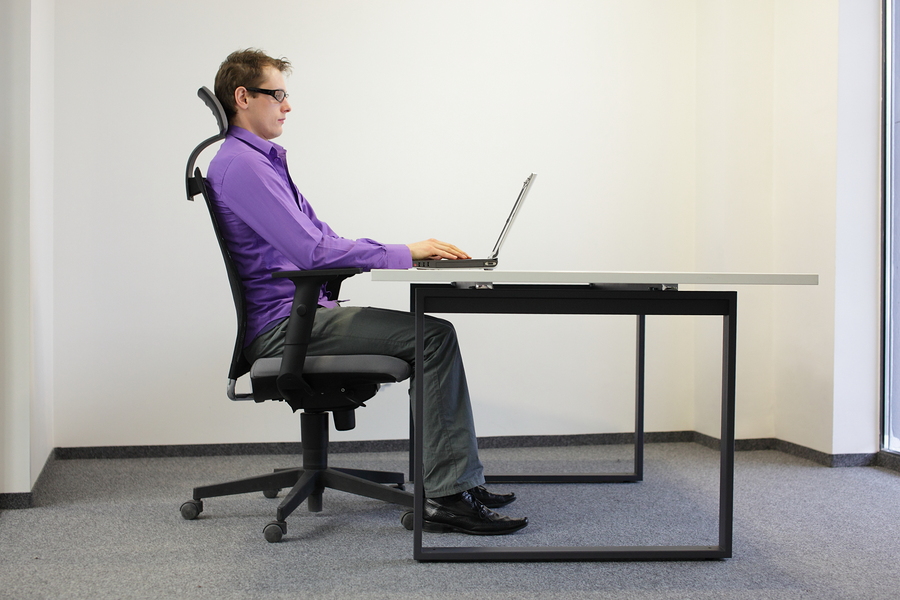
In actuality, sitting with picture-perfect posture for long periods of time can actually lead to more discomfort, as it is extremely fatiguing. It can also lead to joint-pain and muscle strain because the torso is placing constant pressure on the lower disks in your back. Even in the ergonomically correct position, your arms and hands can still incur injuries. Any time you are sitting or standing in a static position, you increase the risk of prolonged physical conditions. To avoid any injuries at your workstation, try alternating between sitting and standing while working. Choose dynamic positions that will increase blood flow and alleviate stiff muscles. Also, include small rest breaks and stretch frequently to help avoid injuries.


Myth #2: Always sit upright, and never recline at the workstation.

4 out of 5 workers would prefer to recline their chair slightly when working. In fact, a reclined position creates much less fatigue than sitting upright. Being slightly reclined is also much easier to maintain and alleviates gravitational pressure on the lower disks in the back. However, be cautious to avoid slouching, which can cause injuries from a lack of sufficient back support.


Myth #3: Ergonomic chairs are one-size fits all.

A single chair size won’t fit every shape and size. Women are shaped differently than men, and their hips are generally wider. Men usually have longer legs and consequently will need a deeper seat. There are many different body types, and each one requires a different seating solution. In addition, different chairs are appropriate for different tasks. When selecting an ergonomic chair, consider the tasks you will be doing and your body size and shape.


Myth #4: Adjust the chair height according to the table height.

Unfortunately, this is not always the case. Although it may seem like a simple solution, this does not always result in a safe sitting position. Instead, keep your chair at the appropriately adjusted position for your body type. If your chair is too low, it can add extra pressure to your legs and back. If the chair is set too high, it can result in discomfort from your feet dangling. You can get a footrest to avoid this, but the best way to avoid injuries is to adjust the table height or the task at hand.

Many people don’t realize that these commonly believed workstation postures are in fact myths. By educating yourself with the above recommendations, you can avoid unnecessary workstation injuries and added discomfort.

Selecting The Best Office Chair

Selecting the Best Office Chair

Not all chairs fit all body types. When selecting the best office chair for your workstation, there are a few different factors that you should keep in mind. When sitting in a chair, your back will be most comfortable in a slightly reclined and neutral position. Each element of the chair should help you maintain this neutral position.

What To Look For When Selecting the Best Office Chair


Seat

Selecting The Best Office ChairThe key to choosing the right chair is the ability to adjust the seat depth, height, and tilt. Choose a seat depth that supports your hips and legs, and look for a chair with sliding seat options. There should be a 1-2” space between the back of your knees and the front of the seat. The height of the chair needs to adjust according to your height. Your feet should be flat on the ground when your hips are pushed to the back of the seat, and you should be able to tilt the chair back to recline or sit upright. A reclining mechanism can also help with increasing movement while working.

Backrest

Back support is very important when selecting an ergonomic chair. The chair should provide lumbar support for your lower back. If this is missing, it can lead to slouching and strain on the back. The back of the chair should allow for height and angle adjustments. The contour of the backrest should allow for free arm movements while still supporting the upper and lower back. If you tend to recline often, you may need a backrest that supports your shoulders and neck. The angle of the backrest should adjust independently from the seat at a 100° to a 110° angle.


Armrests

When your shoulders are relaxed, your forearms should be able to rest on the armrests fully and comfortably. Adjust the armrest inward or outward to affect the width based on your stature. Armrests can support your upper back when taking breaks from typing.
A single chair or adjustment may not be applicable for all tasks, so you may need to experiment with different chairs or adjustments. The goal of an ergonomic chair is to provide you with the comfort and support your body needs.

Ergonomic Desk Guide

Your Guide to a Fully Ergonomic Workstation

If you spend a lot of time sitting at your work desk, it can actually cause some serious health issues if the workstation is not set up properly. Here are some easy adjustments you can make to ensure that you will maintain a healthy posture at an ergonomic workstation.

This is your guide to a fully ergonomic workstation:


Chair

Ergonomic Desk Guide

  • Sit on your chair with your hips completely pushed to the back of the seat.
  • Adjust your chair height so that your feet are flat on the ground.
  • Your knees should be level to your hips or slightly lower than your hips.
  • Recline the back of the chair so that it is at a 100°-110° angle.
  • Support your lower back with a by using an inflatable cushion or a small pillow for extra support. You can also add on a lumbar support to your chair.
  • Set the arm rests at a height where your shoulders are able to relax comfortably on them. Another option is to remove the arm rests altogether.


Keyboard

  • Position the keyboard so that it is directly in front of you and centered with your body.
  • Sit closely to your keyboard to avoid overreaching.
  • While your shoulders are relaxed, position the keyboard so that your arms are at a 100° angle. Ensure that your wrists and hands are straight.
  • If you need to tilt your keyboard up, make sure that your chair reclines so that you are still at a 100° angle.
  • If you’d like to use a palm support, make sure that you don’t let your palms rest on it while typing, as this is not recommended. Additionally, try to keep your wrists slightly elevated when typing.
  • Keep your mouse as close as you can to the keyboard. It should also be at the same level as the keyboard.
  • If you need to adjust your seat height to accommodate the keyboard, keep a footrest under your desk for your feet to rest on. This way your feet will not be left dangling.


Computer Monitor

  • Adjust the monitor to keep your head in a neutral position when working.
  • The top of the monitor should be around 2 to 3 inches higher than eye-level when seated.
  • Your screen should be at least an arms length away.
  • Reduce glare and reflections on your computer screen by adjusting the monitor’s positioning.
  • If you are using a laptop, place it on an adjustable stand, and use an external keyboard and mouse.


Phone

  • Keep your phone as close to you as possible.
  • Wear a headset when possible to avoid holding the handset with your shoulder.


In addition to these guidelines, try to avoid slouching and leaning as much as possible, and don’t forget to take 1-2 minute breaks to stretch every 20-30 minutes. No matter how ergonomically correct your workstation is, sitting for prolonged period of time in a static position can significantly decrease blood circulation which can lead to other health risks. Take the time to set up your workstation the right way. By following this quick guide to a fully ergonomic workstation, you will be able to work safely and comfortably.

Gift Wrapping Ergonomics


Christmas Presents

Wrapping presents can put you at a risk for injury; apply these ergonomic principles to avoid pain.

Avoid wrapping on the floor

 Kneeling or sitting on the same plane the wrapping is taking place on causes you to bend and reach repeatedly.  Typically you will find yourself stretching and holding the awkward positions for extended periods of time. Additionally by kneeling or sitting you are negating the strength that your core and lower body can provide to stabilize your body and lift the items you are wrapping.

Use a counter or table as a workstation

Wrapping on top of a table and or counter is a good solution. A kitchen or dining table with a chair will typically provide you with a good working height while seated. However cutting the full length of most gift wrap still requires stretching and bending, and in some cases standing and bending, to accomplish. Wrapping on a table while standing is not as stressful on the body as sitting on the floor, but can still pose risk.

Use proper lifting techniques

When moving a larger or awkward item that you want to wrap, make sure you use good lifting technique.  Use these tips when moving the wrapped item to the tree as well.lifting_properly

  • Bend your knees and lift with your legs not your back.
  • Keep the item close into your body. This decreases the leverage of the item and the strain to your back.
  • If the item is awkward or too heavy ask for someone to help you with the lift. Alternatively consider using a dolly for heavy boxed items.

Keep often used items within reach

When arranging your workstation for wrapping place items such as scissors and tape within easy reach.  The need to repetitively reach across the table for these items can put stress on the low back.

Use Gift Bags

Gift bags are a great injury prevention alternative to wrapping. Gift bags decrease the time you need to wrap gifts and eliminate the need to reach for paper, scissor, tape, etc.  Consider large plastic decorative plastic bags for large or awkward items.  Added bonus is that you can eliminate waste by saving the bags for next year.

Wrap in shifts and/or take frequent breaks

One of the biggest risk factors for repetitive stress injuries is doing the same task for several hours. To avoid wrapping for prolonged periods consider setting 20-30 minutes aside per day for several days to finish your wrapping. Many people find this option impractical or would prefer to do all the wrapping in one day and be done with it. If you have many gifts that you have been waiting to wrap all at once minimize risk by taking small (30 to 60 second) breaks every 20 minutes to stretch.  Then every hour take at least a 5 minute break to walk around the house or get some water. This will give your body a chance to recover.

Outsource your wrapping

Consider using gift wrapping options at the store or online; avoid the risk all together and save time. This is the best option especially if you are currently injured or prone to injury.   Many stores have gift wrapping options in store or through online delivery.  Additionally, many organizations offer gift wrapping in exchange for a small fee that will go to charity.  Avoid repetitive stress injury and support charity at the same time!  All you are left to do is to place them under the tree…using proper lifting techniques if heavy of course.


Kids Backpack

BACKPACK SAFETY

Child Backpack Fit Guide

Backpacks are a practical way for students to carry schoolbooks and supplies. They are designed to distribute the weight of its contents among some of the body’s strongest muscles; however, in recent years, the weight of student backpacks has increased dramatically and has become a public health concern. Studies show that heavy backpacks can lead to both back pain and poor posture, notes the American Chiropractic Association (ACA). In fact, in 2001 backpacks were the cause of 7,000 emergency room visits and countless complaints of muscle spasms, neck and shoulder pain.

Here are some tips on purchasing a backpack, packing a backpack, and wearing a backpack to reduce the risk of injury.


Purchasing a backpack, what does a good backpack need

  1. Wide( > 2), Padded Straps 
    The bag should have wide padded shoulder straps. Wide straps and padding distribute the load over more area of
    the shoulder and alleviate pressure points.
  2. Padded Back
    The back of the backpack should padded as well to encourage the pack to sit flat against the back.
  3. Lightweight
    Reducing the overall weight carried begins with a light backpack. The stress on the back is caused by the weight of the bag, don’t forget that the weight of the bag contributes to the overall weight. Anything you can do to reduce that weight will reduce the stress.
  4.  Waist Strap
    A waist strap dramatically helps direct the load away from the shoulders and onto the much stronger waist and hip muscle group.
  5. Proper Size
    Use the chart below for general recommendations by age or for more accuracy you can take measurements of your child’s back.  The width should be from the outside ridge of the one shoulder blade to the other. The height should be from the shoulders to the waist line (belly button) plus two inches. See the diagram below to help with measuring.

 Child Backpack Fit Guide

Child Backpack Size Chart


Loading a Backpack

  1. Load heavy items close to the back (the back of the pack)
    Heavy flat items should be placed against the back. This increases the body’s ability to support the weight with stronger muscle groups such as the hips and core.
  2. Don’t overload (see weight chart below)
    As a general rule the weight of the backpack should not be more than 15-20% of the students body weight. It should not exceed 25 pounds in any case.  Below is a table with the recommended weight to be carried based on the student’s weight.

Backpack Weight Chart


How to wear a backpack properly

  1. Wear BOTH straps                                                                                                                                                                    
    This helps distribute the load more evenly and helps hold the load more securely to the back. Wearing one strap can lead to shoulder and back pain.
  2. Adjust shoulder straps so the backpack fits snugly against the back                                                                                   
    The back pack should rest no lower than 4 inches below the waist line. Remember that the waistline is in line with the belly button not the top of pelvis.
  3. Fasten waist belt and adjust strap length to secure and distribute the weight evenly                                                       
    The benefits of the waist strap can only be seen if the strap is worn. Don’t forget to have your student fasten it when wearing.
  4. The lower bulk of the backpack should rest in the curve of the lower back and not more than four inches below the waist
    This also contributes to allowing the stronger muscles of the hips and shoulders to support the load.


Other considerations

  • Monitor what your child is carrying to school each day to help him or her avoid carrying unnecessary items which add weight to the backpack.
  • Periodically check to see if your child is wearing his or her backpack correctly.
  • Assist your child with cleaning out and organizing the backpack weekly.
  •  If the backpack weighs more than 15% of your child’s body weight have child carry a heavy book or two under his or her arm.
  • Ask your child if he/she has any discomfort during or after wearing the backpack.
  • Help your child file work at home so he/she only needs to bring required work to school each day.
  • Talk to your child and teachers about ways to reduce backpack weight.
  • Some books can be found online at low cost. Consider purchasing a second copy to keep at home so your child doesn’t have to carry it back and forth.
  • Share any concerns about backpack weight with your child’s teacher or administrator.


Taking the time to make careful consideration regarding your child’s backpack use is important to prevent injury.  If your child does develop back pain have him or her seen by a qualified health professional for proper diagnosis and treatment.

-Dr. Rose, DC

Dr. Rose is a San Diego Chiropractor located in Mission Valley.  More information regarding the services he provides can be found at www.RoseChiropracticSD.com.


References

American Chiropractic Association. Backpack Misuse Leads to Chronic Back Pain, Doctors of Chiropractic Say. Accessed at acatoday.org

Admas, Chris. A Fitting Guide for a Child’s Backpack. 2006.

Howard County Public School System. Backpack Safety Guidelines