Posts

Knee pain san diego treatment

Patellar Tendonitis and Knee Pain

The patellar tendon runs from the bottom point of the patella (knee cap) and runs down to the top of the tibia (shin bone). It acts as a pulley to lift the leg upward into extension when the quadricep muscles contract. Leg extension is important in many sports and day to day activities; squatting, walking up and down stairs, getting in and out of cars, etc.
When the quadriceps become overused, excessive amount of load occurs at the patellar tendon and patellar tendonitis begins to develop.

What are the Symptoms of Patellar Tendonitis?

Patellar tendonitis is characterized by pain and possibly inflammation along the patellar tendon. Early stages of patellar tendinitis tends to cause pain after exercise/aggravating activity, and then goes away hours after the activity; it may also be felt at the start exercise but feels better as exercise continues. As the condition progresses, pain may be felt before, during, and then is worse after exercise. If it gets ignored and an athlete tries to push through the pain, the tendon will actually start to deteriorate resulting in patellar tendinosis.

Patellar Tendonitis Treatment San Diego

Who are at risk?

Athletes who perform repetitive jumping and leg bending are at risk to develop patellar tendonitis. Basketball players, CrossFit athletes, volleyball players, runners, cyclists, backpackers/hikers, triathletes, are all at a higher risk due to the potential overuse of the quadricep muscles. Specifically for running and hiking, performing lots of down hill routes will increase the likelihood of developing patellar tendonitis.

Evaluation

In most cases, patellar tendinitis can be diagnosed with a thorough history of the injury and brief physical exam. In some cases, imaging such as a X-ray or MRI may be necessary to rule out other conditions such as meniscus injury, patella alta, chondromalacia, arthritis, etc. Check out our blog here for other causes of anterior knee pain.

Treatment for Patellar Tendonitis in San Diego

For acute pain relief, Active Release Technique, Graston Technique, stretching, foam rolling, and training modification are essential. As the patient improves, eccentric exercises are prescribed to repair the patellar tendon. This helps strengthen tendon fibers to resist future load from activity. Eccentric loading for patellar tendinosis is even more important as this restarts the inflammatory process at the tendon so the tendon can heal.

Stop dealing with patellar tendinitis on your own. Schedule today to get evaluated by our sports chiropractors located in Mission Valley, San Diego. We have helped countless athletes overcome knee pain with our targeted approach.

Hip pain running doctor San Diego

Types of Hip Pain and Running

The hips play an important role during running. Running is essentially a single legged sport once you break down the movement.  The hip not only helps propel the body forward but also is a stabilizer of the lower back and the leg during the gait cycle. Due to the demands placed on the hip, it is susceptible to overuse, and acute running injuries. A running doctor can help by diagnosing the problem correctly and developing a treatment plan to get you back to running pain free.

Common types of hip injuries found in runners

There are many types of running injuries that can occur at the hip. Pain may be felt in the front, outside,inside, or back of the hip. Certain cases runner’s will describe the pain as deep in the hip joint. We will categorize the most common types of injuries we see based on location of the injury:

Front hip pain in runners

  • Hip flexor strain
  • Rectus Femoris/quadricep strain
  • Iliopsoas bursitis
  • Iliopsoas tendinitis/tendinosis
  • Rectus femoris tendinitis/tendinosis
  • Hip impingement
  • Hip labral tear
  • Stress reaction/stress fracture
  • Hernia

Outside hip pain in runners

  • Gluteus Medius tendinopathy
  • Iliotibial band syndrome
  • TFL strain
  • Trochanteric bursitis

Inside hip pain in runners

  • Adductor strain
  • Adductor tendinopathy
  • Iliopsoas tendinopathy
  • Hip impingement
  • Hernia

Back hip pain in runners

  • Hip osteoarthritis
  • Hip labral tear
  • Gluteal muscle strain
  • High Hamstring injury
  • Piriformis syndrome
  • Low back pain referral
  • Sciatica

To complicate the injury spectrum, there are cases where runners feel pain in the hip but is a referral from joint/nerve impingement from the lower back. Also if the hip is weak and injured, other injuries to the lower back, knee, shin, and foot may become prominent. Receiving a diagnosis from a running doctor trained in diagnosing and treating runners is very important.

Hip pain treatment

Our sports chiropractors at our Mission Valley office are trained to treat a wide variety of running injuries. We specialize in Active Release Technique, Graston technique, running form analysis, and rehabilitative/performance exercise. Schedule today to get evaluated by a running doctor who knows how to get your training back on track!

Do you Run with a Cross-Over Gait?

Do you Run with a Cross-Over Gait?

A cross-over gait, also known as a “tightrope” gait, involves running with your feet crossing the midline of your body. As each foot crosses midline, it appears as if you a running along a tightrope. This running style decreases running efficiency and may set you up for future injury (or prolong your current injury!). The areas commonly injured are the inner shin/tendons, knee, outer hip/IT band, and lower back. Beginner runners, and runners with weak core/gluteal muscles tend to run with this type of gait. 

Do you run with a cross-over gait?

The absolute easiest way to diagnose a cross-over gait is by having a gait analysis performed. A professional gait analysis is recommended but a quick video recorded by a friend can be show if the feet cross midline. Setting up a camera behind a treadmill while running solo is another easy way check for cross-over gait (see runner below).  As you watch the stride, look for where the foot lands in relation to the body’s midline.

Other signs of a cross-over gait include: excessive wear on the outside bottom of shoes, scuff marks on the inner legs ( you actually hit yourself with your foot from running too narrow!), side to side head bob noticed visually when looking straight ahead, and inline foot prints when running on sand or dirt. The main symptom of a cross-over gait is recurring injury to the same area with running. Symptoms tend to lessen with treatment and rest but return with increased running volume, intensity, or both. 

 Why is a cross-over gait less efficient?

Simply put, you are wasting energy moving side to side; the more energy spent moving side to side, less energy spent moving forward. Cross-over gait puts a lot more demand on tissues which will cause the muscles of the core, hip, lower leg to work extra hard. The demand will create more fatigue which in turn will decrease efficiency further. 

How does a cross-over gait cause injury?

With a cross-over gait, the foot strikes at or across midline , forcing our joints to work in a non-stacked position. The lower extremity performs best with a stacked orientation to absorb shock/strain with muscles. With the joints working at a slight angle, several tissues now have to work harder to absorb shock and slow down joint movement. The following injuries are commonly associated with a cross over gait:

  1. Posterior shin splints/Posterior Tibialis tendinopathy– While running with a cross-over gait, the foot lands excessively on the outside part of the foot and as the body weight shifts forward, the foot quickly flattens. The slapping down of the foot is often viewed as “over pronation” when in reality, the foot and ankle are pronating too quickly. The posterior tibialis muscle (and other lower leg muscles) must contract powerfully to slow this motion down. This causes excessive strain of the muscle causing shin and tendon pain. Over pronation is not the issue and is a reason why changing footwear in these cases is not helpful. 
  2. Knee pain– As the leg moves toward middle, the inner knee structures get over stretched. The kneecap likes to move in a straight line over the knee. If the muscles are contracting around an angled joint, abnormal tracking of the knee cap occurs.  Patients often have pain at the front part of their knee. If chronic irritation occurs, it can cause swelling around the knee/knee cap.
  3. Outer hip/IT band pain– Again as the leg moves inward, the outer hip elongates, allowing the pelvis to “drop”. This over stretches the outer gluteal muscles. As the hip muscles become more strained, the less stability they are able to provide. Trochanteric bursitis, iliotibial band syndrome are two common conditions that arise from overused/weakened hip muscles. 
  4. Lower back pain– Keeping in mind with what occurs at the hip, the low back joints and muscles get stretched abnormally as the pelvis “drops” due to weak gluteal muscle stabilization. Local low back pain is common from this constant side to side joint irritation. Symptoms may be significantly worse if a runner  has disc degeneration and/or low back joint degeneration.
Cross-over gait injuries

Potential sites for injury with cross over gait

A runner with a cross over gait and a cadence of 180 steps per minute, will cross over 5,400 times during a 30 minute run! Running with a cross-over gait will only worsen as fatigue sets in, setting runners up for injury. It is important to identify this running pattern and address the deficiencies to avoid injury. If you have chronic injuries or recurrent injuries to the same body part, you may be running with a cross-over gait. In our upcoming blog posts, we will be discussing ways to fix a cross over gait and run more efficiently.  

If you are interested in being evaluated for running injuries, our office is conveniently located in Mission Valley, San Diego!

5 Ways to Strengthen Weak Ankles and Prevent Ankle Injuries

Prevent Ankle Injuries: 5 Ways to Prevent Ankle Injuries

5 Ways to Prevent Ankle Injuries

Ankle injuries are one of the most common injuries among athletes. While it is impossible to completely prevent ankle injuries, taking precautionary measures before exercising can help limit the risks. Listed below are stretches to help strengthen and loosen up the muscles around the ankles. These exercises are great for both preventing injuries from happening and helping you recover from an existing injury:

  1. Peroneal Stretches

    One of the most important muscles to strengthen during any recovery or prevention of an ankle sprain is the peroneal muscle. These muscles extend from the top of the knee all the way down to where they attach at the bottom of the foot.

    The exercise is easy: Gently roll onto the outside of your feet and walk around for 60 seconds. This helps strengthen your ankle muscles and gives them additional flexibility.

  2. Ankle Circles

    This simple exercise will help strengthen the muscles in and around the ankle, improving the joints stability. You can either sit on a chair or stand for this conditioning.

    Extend your leg straight out, without bending the knee. Rotate your foot clockwise 10 to 20 times, rest leg for 5 seconds, and raise it again to rotate counterclockwise 10 to 20 times. Alternate legs and do 3 or 4 sets per side.

  3. Dorsiflexion Stretches

    The Dorsiflexion stretch is crucial amongst runners. This stretch is responsible for strengthening the muscles that run along the shin of the leg, called the Anterior Tibialis. This muscle is what controls the up and down movements of the toes. Therefore, strengthening this muscle will not only help prevent shin splints, but can also help protect the muscles and tendons in the ankle.

    First, sit on the floor with your right leg straight out and the left leg crossed, with the sole of your left foot resting against the inside of your right leg. Place a towel or band around the ball of the right foot and gently pull your toes back toward you. Hold for 15 seconds, repeat the stretch 4 times, and then switch legs.

  4. Write the Alphabet

    This exercise is as easy as reciting the alphabet! All you are doing is tracing every letter of the alphabet with your big toe. This exercise is best if you are seated in a chair.

    Hold your right leg straight out in front. Using your big toe as the “pen”, first write each letter of the alphabet in all capital letters. The same process again with lower case letters, then switch feet and repeat. Writing the alphabet is a challenging exercise that will help strengthen both of your ankles!

  5. Achilles Stretches

    Rupturing the Achilles tendon can set you back for quite a while. By doing regular Achilles stretches, you can help limit the risk of rupturing the tendon and help improve flexibility.

    From a standing position, bend the knee of your left leg at a 45 degree angle. Step the right leg back and keep it straight. Ground the heel of your right foot and push the hips forward. Hold this position for 15 to 30 seconds and then switch legs, repeating 2 to 4 sets on each leg.

Athletes at Risk

At our Mission Valley Office, we see many athletes with injured ankles including: ballet dancers, MMA fighters, soccer players, baseball players, and foot ball players. It is important to perform the above mentioned exercises to help prevent ankle injuries. If you are currently experiencing an injury to the ankle, please schedule with our certified sports chiropractors today!

rock climbing injury

Rock Climbing and Pulley Injuries

Finger pulley tears are one of the most common injuries in rock climbing, but many climbers may not know how to identify or treat this type of injury. What is a pulley, anyways? A pulley could best be described as a group of fibers that help secure tendons to the bone. For those who may be experiencing a finger pulley injury, be on the lookout for the following:

  • Grade I (sprain):

    Symptoms may include some pain when squeezing or climbing. Treatment may include taping the injured finger to relieve stress and massaging the finger at the injury site. Squeezing a putty such as TheraPutty a few times each day is also a very good tool to aid in recovery. Climbing is okay, but should be done at a reduced level of difficulty. Soft tissue treatment such as Graston and Active Release Technique (ART) can be effective for in the initial phases for Grade I.

  • Grade II (partial rupture of pulley tendon):

    Symptoms include pain with squeezing or climbing and possibly when extending the finger. Treatment can include massage and putty, as with Grade I, but no climbing should be done for the first 1-2 weeks. When it is time to return to climbing, start back slowly and tape the fingers.

  • Grade III (complete rupture of pulley):

    Symptoms can include sharp pain at the pulley, you may hear a “pop” sound, possible bruising and swelling, pain when squeezing/climbing. Treatment may include taking ibuprofen and the regular use of a cold compress for the first couple of days. No climbing! A splint may be used to immobilize the injured tendons. After 4-8 weeks, putty can start to be used to help strengthening, along with the Grade II treatment.

As with any injury, your first step should be to seek care from a medical professional to determine the correct treatment plan, but these descriptions are intended to serve as a general guideline of what to expect from a pulley injury. If you’re in pain, make sure you don’t ignore it!

IT Band Syndrome treatment San Diego

Iliotibial Band Syndrome

Check out our updated post on IT band treatment found here: New Methods in Treating IT Band Syndrome!

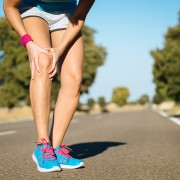
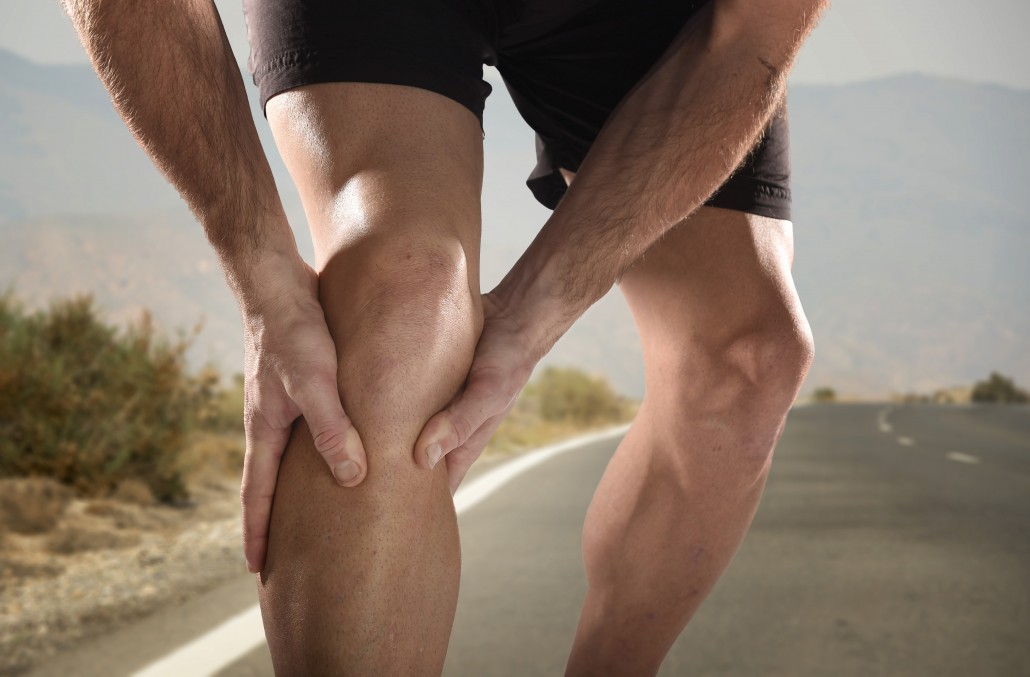
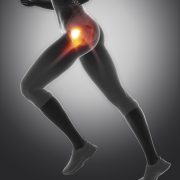
Iliotibial band syndrome (ITBS) is a painful, frustrating condition that affects the outside part of the knee. The IT band is a thickening of inelastic connective tissue which arises from the Tensor Fascia Latae and the Gluteal muscles and inserts into the outside of the tibia and Tibialis Anterior.1 During movement, the IT band approximates the lateral aspect of the knee, creating an “impingement zone” and irritates the tissues found there, primarily a highly innervated fat pad.2,5 With repetitive flexion and extension of the knee, particularly during excessive running, ITBS can develop and cause moderate to severe pain on the outside of the knee.

Who is at risk?

Active individuals are prone to iliotibial band syndrome due to chronic “overuse” type of trauma to the IT band and muscles of the thigh/buttock. A number of risk factors put a person at a greater risk for developing ITBS which include: training intensity/duration, running down hills, wearing shoes with poor arch support, biomechanical factors such as flat feet, gluteus medius weakness, etc.4  Runners who run while fatigued, may be at more of a risk for developing ITBS due to increased flexion at foot-strike; this results in greater impingement at the “impingement zone” of the knee leading to greater tissue irritation.2

Examination

Sports chiropractors will carefully evaluate the knee including: ROM, various orthopedic tests, and a specific palpatory assessment, which allows the practitioner to identify muscles that have developed myofascial adhesions, causing muscle tension and pain.

The knee is caught between two other main joints of the lower extremity: the ankle, and the hip. The IT band connects to the hip musculature and also has fascial connections to the tibialis anterior, the bulky muscle in the front of the lower leg.1 Examination of the hip, lower leg, and ankle may also be assessed in an attempt to determine dysfunctional muscles, joints, and structures which may be causing excessive stress at the outside of the knee.

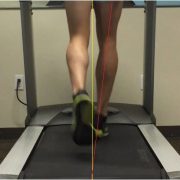
A functional evaluation will also be performed to determine movement patterns that may cause excessive stress on the knee/IT band. A gait assessment both walking and running may reveal over pronation at the foot, or hip dropping during the stance phase of the gait cycle. Squats and lunges may reveal deviation of the knee towards midline, which may indicate glute medius weakness on the same side.

Treatment

Iliotibial Band Syndrome Treatment Graston San Diego

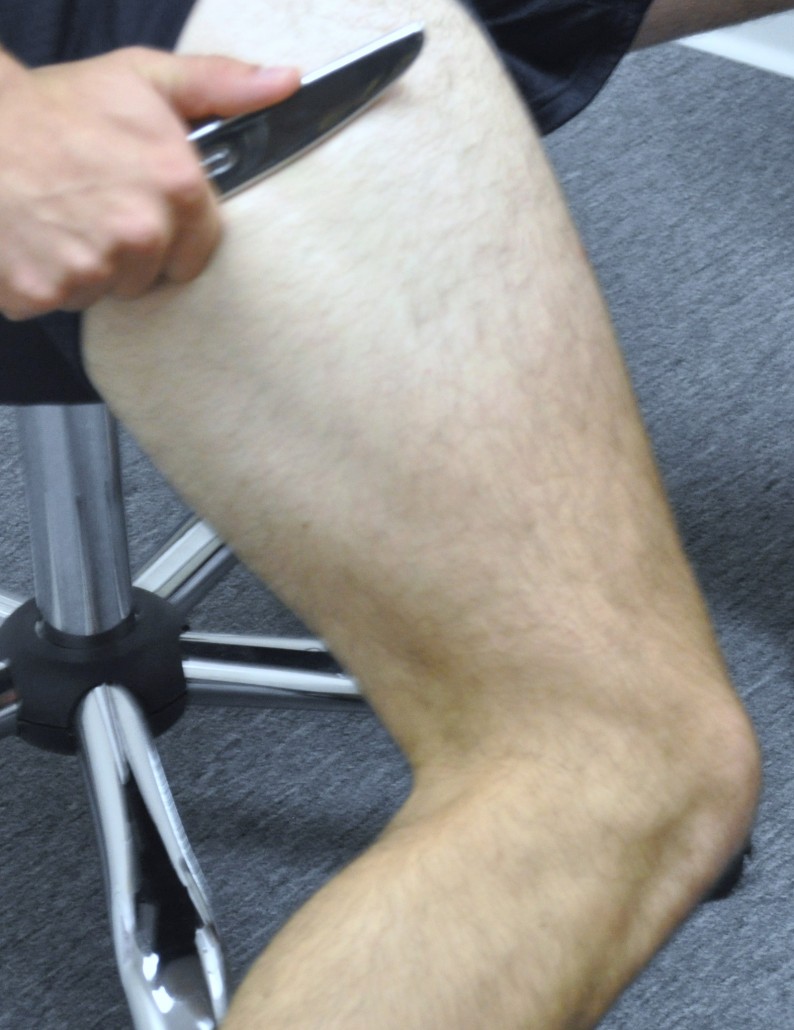
Graston® Technique applied to IT band/Quadricep.

Treatment depends on the stage at which the ITBS is found at the time of examination. To combat swelling and pain associated with ITBS, treatment primarily involves ice and modification of activity.3,4 Patients can ice the knee at home using ice massage for 3-8 minutes, two times per day to combat the inflammatory process.

Sports chiropractic care primarily involves addressing the soft tissue structures that affect the IT band. Active Release Technique (ART®) is used to remove myofascial adhesions (scar tissue) that have developed in the muscles that surround or connect into the IT band: gluteus maximus/medius, TFL, vastus lateralis (outside quadriceps muscle), biceps femoris (outside hamstring), and in some cases the tibialis anterior. The practitioner will have you perform specific movements for each structure involved, while deep pressure is applied to the structure to help stretch the myofascial adhesions to help restore proper function to the muscles and remove excessive tension that may be exacerbating the ITBS.

Some ART® protocols are designed to break down adhesions within the muscles, while other protocols are designed to restore relative motion between myofascial structures. The latter is important for IT band syndrome as the band itself lies over the large vastus lateralis and biceps femoris. Improving the movement between these structures will help remove tension at the outside of the knee.

Chiropractic adjustments may be used to improve the joint function of the low back, pelvis, hip, knee, and ankle to help improve the symptoms at the knee.

Rehabilitation

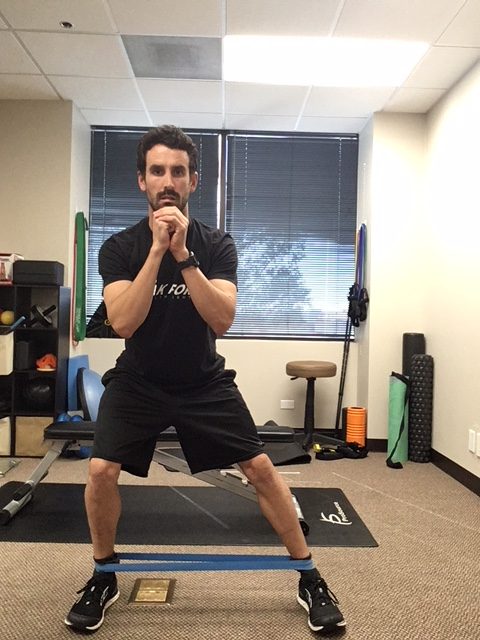
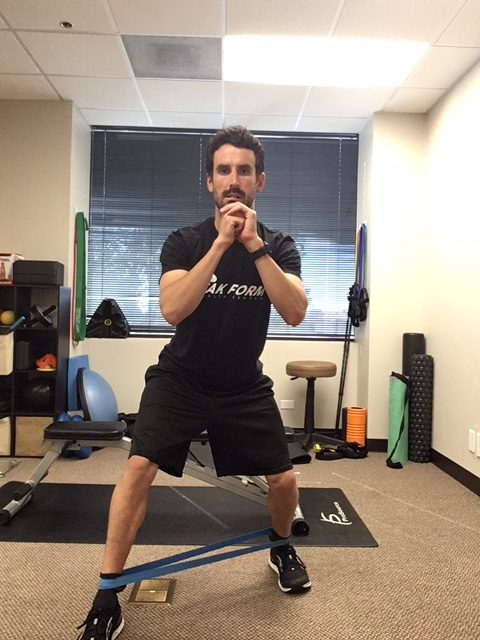
Once pain has significantly decreased, specific exercise protocols will be given to help prevent recurrence of symptoms and strengthen weak muscles such as the gluteus medius muscle. Gluteus medius weakness results in greater adduction angle at the knee (knee moves inward) during gait which results in over stabilization of the IT band leading to ITBS, trigger points, and contracted muscles.6,7 Proper strengthening of the glute medius will result in greater hip stabilization and keep the knee from deviating towards midline during dynamic movements (running, squatting, jumping).The IT band is an inflexible structure, however, IT band stretching can help relieve tension in the muscles that insert into the IT band. In addition to static stretching, the use of ischemic compression through the use of a foam roller can be used to successfully decrease the sensitivity and intensity of trigger points.8

IT band syndrome exercises san diego

It band syndrome exercises

Iliotibial band syndrome exercises San Diego

Raise knee as high as possible without losing positioning.

For runners, once pain has been minimal for 2 weeks and strengthening exercises are performed, a running routine can resume.3,4 Running should take place every other day on a flat surface with easy sprints and no hills.3,4 Gradual increases in frequency and duration of running should occur over a period for 3 to 4 weeks.4

Other Treatment Options

Other treatment options for ITBS include NSAIDs for pain and swelling.In chronic cases that have not responded to conservative care, corticosteroid injections may be warranted.10 In rare cases surgery may be performed to release the tension of the IT band over the lateral knee.11

Conclusion

If you are experiencing knee pain, it is important to get evaluated by a sports chiropractor to determine the exact cause. ITBS is a very common condition affecting approximately 8.4% of injured runners.9There are a number of conservative options for patients who are affected with this condition, particularly Active Release Technique (ART®) to help relieve pain associated with ITBS. ART®, chiropractic adjustments, stretching of the TFL/IT band, followed by gluteus medius strengthening and a gradual return to activity will result in most patients recovering from ITBS in 6 weeks.4


References

Meyers, T. W. (2009) Anatomy Trains: Myofascial Meridians for Manual and Movement Therapists. New York, NY: Elsevier.

Fredericson, M., and Weir, A. (2006). Practical management of iliotibial band friction syndrome in runners. Clinical Journal of Sports Medicine, 16 (3), 261-268.

Ellis, R., Hing, W., and Reid, D. (2007). Iliotibial band friction syndrome- a systematic review.  Manual Therapy, 12, 200-208.

Fredericson, M., Wolf, C. (2005). Iliotibial band syndrome in runners innovations in treatment. Sports Medicine, 35 (5), 451-459.

Fairclough, J. et al. (2006). The functional anatomy of the iliotibial band during flexion and extension of the knee: implications for understanding iliotibial band syndrome. Jounral of Anatomy, 208, 309-316.

Miller, R. H., Lowry, J. L., Meardon, S. A., and Gillette, J. C. (2006). Lower extremity mechanics of iliotibial band syndrome during an exhaustive run. Gait and Posture, 26, 407-413.

Ferber, R., Noehren, B., Hamill, J., and Davis, I. (2010). Competitive female runners with a history of iliotibial band syndrome demonstrate atypical hip and knee kinematics. Journal of Orthopaedic & Sports Physical Therapy, 40 (2), 52-58.

Hanten, W. P., Olson, S. L., Butts, N. L., and Nowicki, A. L. (2000). Effectiveness of a home program of ischemic pressure followed by sustained stretch for treatment of myofascial trigger points. Physical Therapy, 80 (10), 997-1003.

Taunton, J. E., Ryan, M. B., Clement, D. B., McKenzie, D. C., Lloyd-Smith, D. R., and Zumbo, B. D. (2002). A retrospective case-control analysis of 2002 running injuries. British Journal of Sports Medicine, 36, 95-101.

Hong, J. H., and Kim J. S. (2013). Dignosis of iliotibial band friction syndrome and ultrasound guided steroid injection.The Korean Journal of Pain, 26 (4), 387-391.

Sangkaew, C. (2007). Surgical treatment of iliotibial band friction syndrome with the mesh technique. Archives of Orthopaesic and Trauma Surgery, 127, 303-306.

whiplash san diego

Chiropractic and Whiplash – San Diego

Whiplash is the medical name for an injury to the neck that is created from a sudden jolt from front to back that creates a whip style movement. Whiplash is more often sustained in motor vehicle accidents; however, it can occur from a fall or sports/work related injury and so forth. The Whiplash injuries are normally due to the result of a sprain-strain to the neck, where the ligaments which provide support, protection and also limit the movement of the vertebrae are damaged. The most commonly injured joints are the facet joints which are located in the back portion of the spine. However, these are usually not the only injuries.

With more severe whiplash injuries tendons and muscles are strained and stretched, vertebral discs can be bulge or herniate, and the nerves may also suffer stretching and become irritated and inflamed. The most common symptoms that are felt with whiplash are stiffness and pain through the neck, generally found in the areas that have sustained damage. Most commonly pain will be in the front and back of the neck and turning the head will make the pain more severe. A headache is also a normal symptom of whiplash. Pain can also be found to extend through the upper part of the body.

In addition to the joint pain, some people experience dizziness, sickness, and even visual problems following a whiplash injury. These symptoms must not be ignored, and medical intervention should be sought if they do not resolve in a day or two. Whiplash symptoms are not always immediate and can take up to two days to appear.

Those suffering from whiplash need to stay active unless they have sustained an injury that requires immobilization. They may be worried but should move as much as possible. The doctor will more than likely prescribe some form of stretching exercises. These exercises are very important to aid recovery.

It is normal to use ice or heat to control the pain and reduce swelling after a whiplash injury. The injured party may also have electrical stimulation or ultrasound if necessary for short term relief. In the case of neck pain, spinal manipulation or spinal mobilization from a chiropractor can provide additional relief.

Active Release Technique

The Power of ART – Active Release Technique

Struggling with carpal tunnel can be a debilitating experience. The inflammation around tissues and nerves in the wrist can make it difficult to perform daily tasks. The classic symptoms of carpal tunnel include numbness or pain that occurs on the thumb-side of the hand, pain that radiates up to the shoulder, and the muscles in the thumb becoming severely distorted. However, there is no need to suffer with this condition when there is ART (Active Release Technique) to help you relieve the symptoms.

One can experience the relief of the pain and numbness without invasive surgery or traditional procedures of medicine. The continuance of these symptoms is the direct result of misdiagnosis and the misinterpretation of what carpal tunnel actually is. It’s more than just the entrapment of one single nerve in the thumb; rather, it’s a more common problem that takes place further up the arm, in the muscle called the Pronator Terres. Because of this, adding a brace to the wrist can actually make the problem worse.

ART, on the other hand, is designed to eliminate the problem from the get-go, allowing patients to make a much faster recovery than with conventional methods. Instead of focusing on just one area, ART aims to restore unimpeded range of motion and function to the soft tissues of the arm and wrist.

Professionals who are trained in the technique of ART can evaluate the texture and mobility of soft tissue, and, using hand pressure, removes or breaks up the fibrous adhesions that are present in the soft tissues. This can drastically improve the recovery from this debilitating condition, and abate the symptoms for much longer periods of time between each treatment.

There are typically three levels of ART that are performed by the practitioner himself while the fourth requires the patient to be involved with the active movement of the tissue while the practitioner applies the required tension to improve the results of the treatment even more. It has been scientifically proven that patients who are actively involved with the process of their treatment are more likely to make a better recovery than those who don’t.

Understand the true source of the pain you’re experiencing, and take steps to resolving your condition before it becomes too much to handle.

Debunked Workstation Myths

Debunked Workstation Myths

There are many commonly accepted guidelines for a safe and comfortable workstation that are actually myths. Some postures and furniture can actually harm you and lead to discomfort, if rigidly followed. These debunked workstation myths will help you to manage the health risks of your home or work office:


Debunked Workstation Myths


Myth #1: Sitting correctly at a desk will eliminate discomfort and reduce injuries.

Debunked Workstation MythsIn actuality, sitting with picture-perfect posture for long periods of time can actually lead to more discomfort, as it is extremely fatiguing. It can also lead to joint-pain and muscle strain because the torso is placing constant pressure on the lower disks in your back. Even in the ergonomically correct position, your arms and hands can still incur injuries. Any time you are sitting or standing in a static position, you increase the risk of prolonged physical conditions. To avoid any injuries at your workstation, try alternating between sitting and standing while working. Choose dynamic positions that will increase blood flow and alleviate stiff muscles. Also, include small rest breaks and stretch frequently to help avoid injuries.


Myth #2: Always sit upright, and never recline at the workstation.

4 out of 5 workers would prefer to recline their chair slightly when working. In fact, a reclined position creates much less fatigue than sitting upright. Being slightly reclined is also much easier to maintain and alleviates gravitational pressure on the lower disks in the back. However, be cautious to avoid slouching, which can cause injuries from a lack of sufficient back support.


Myth #3: Ergonomic chairs are one-size fits all.

A single chair size won’t fit every shape and size. Women are shaped differently than men, and their hips are generally wider. Men usually have longer legs and consequently will need a deeper seat. There are many different body types, and each one requires a different seating solution. In addition, different chairs are appropriate for different tasks. When selecting an ergonomic chair, consider the tasks you will be doing and your body size and shape.


Myth #4: Adjust the chair height according to the table height.

Unfortunately, this is not always the case. Although it may seem like a simple solution, this does not always result in a safe sitting position. Instead, keep your chair at the appropriately adjusted position for your body type. If your chair is too low, it can add extra pressure to your legs and back. If the chair is set too high, it can result in discomfort from your feet dangling. You can get a footrest to avoid this, but the best way to avoid injuries is to adjust the table height or the task at hand.

Many people don’t realize that these commonly believed workstation postures are in fact myths. By educating yourself with the above recommendations, you can avoid unnecessary workstation injuries and added discomfort.

Selecting The Best Office Chair

Selecting the Best Office Chair

Not all chairs fit all body types. When selecting the best office chair for your workstation, there are a few different factors that you should keep in mind. When sitting in a chair, your back will be most comfortable in a slightly reclined and neutral position. Each element of the chair should help you maintain this neutral position.

What To Look For When Selecting the Best Office Chair


Seat

Selecting The Best Office ChairThe key to choosing the right chair is the ability to adjust the seat depth, height, and tilt. Choose a seat depth that supports your hips and legs, and look for a chair with sliding seat options. There should be a 1-2” space between the back of your knees and the front of the seat. The height of the chair needs to adjust according to your height. Your feet should be flat on the ground when your hips are pushed to the back of the seat, and you should be able to tilt the chair back to recline or sit upright. A reclining mechanism can also help with increasing movement while working.

Backrest

Back support is very important when selecting an ergonomic chair. The chair should provide lumbar support for your lower back. If this is missing, it can lead to slouching and strain on the back. The back of the chair should allow for height and angle adjustments. The contour of the backrest should allow for free arm movements while still supporting the upper and lower back. If you tend to recline often, you may need a backrest that supports your shoulders and neck. The angle of the backrest should adjust independently from the seat at a 100° to a 110° angle.


Armrests

When your shoulders are relaxed, your forearms should be able to rest on the armrests fully and comfortably. Adjust the armrest inward or outward to affect the width based on your stature. Armrests can support your upper back when taking breaks from typing.
A single chair or adjustment may not be applicable for all tasks, so you may need to experiment with different chairs or adjustments. The goal of an ergonomic chair is to provide you with the comfort and support your body needs.