Posts

Active Release Technique San Diego

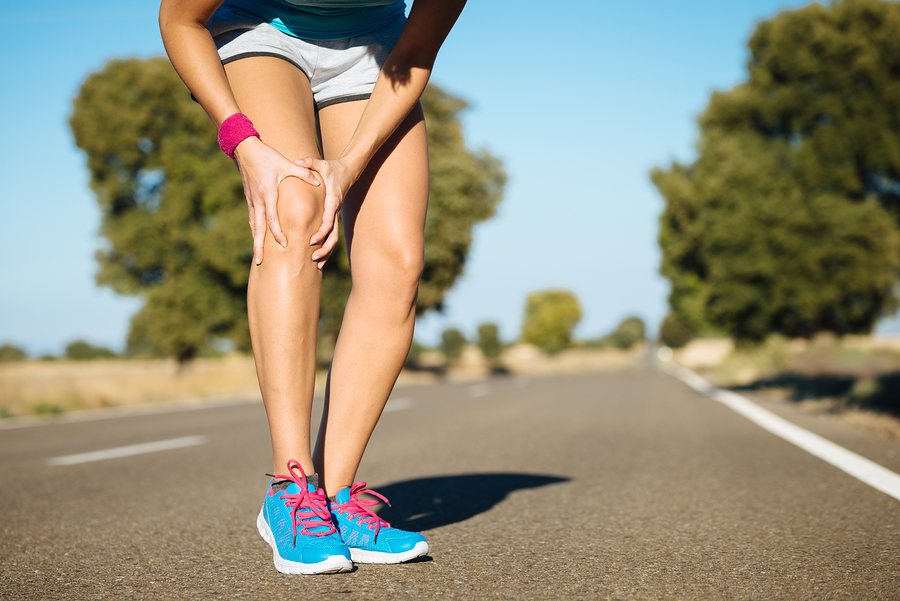
Manage Triathlon Injuries and Training

Triathlon season is in full swing here in San Diego. With local races nearly every weekend, many triathletes have trouble balancing time between training, family, jobs, and racing competitively. Many triathletes begin to notice nagging triathlon injuries that are consistently getting worse as the season continues. Should they take a break to heal? Maybe. It depends on the athlete, their goals, and how they take care of their bodies during the season. Below are the top 5 triathlon injury management techniques we recommend to our athletes.

Active Release Technique ART San Deigo

  • Sports Chiropractic Care– We may be slightly biased here but this is the reason why we do what we do. We offer the best manual therapy and exercise methods to keep our triathletes swimming, biking and running. Triathlon injuries are managed effectively with a combination of Active Release Technique, Graston technique, joint manipulation and rehabilitative exercise. Have you seen or are you currently seeing a Sports Chiropractor? Sports chiropractic utilizes all the techniques previously mentioned as well advice on training through the injury; you can read more about the difference between a general chiropractor and a sports chiropractor here: Benefits of Sports Chiropractic.DACBSP Certfified
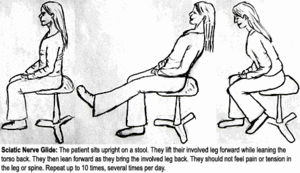
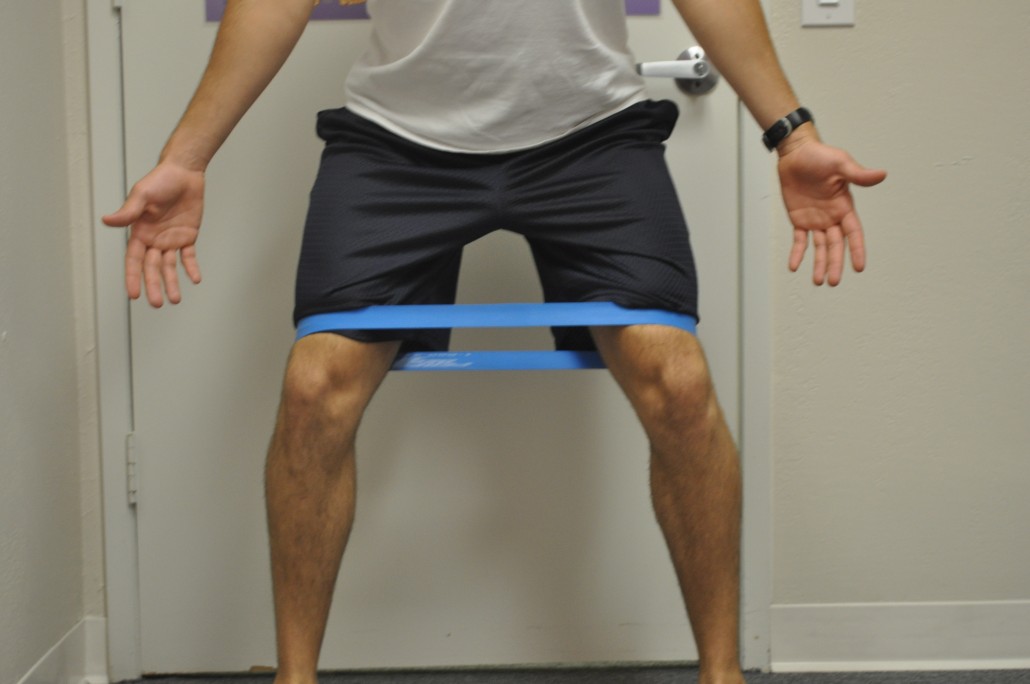
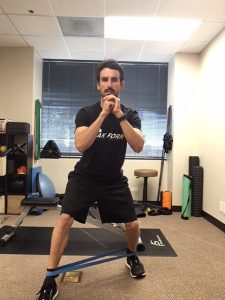
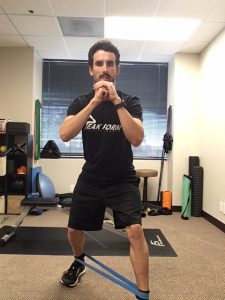
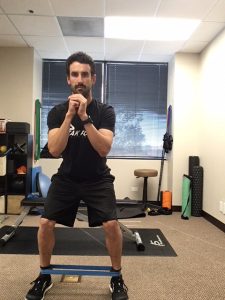
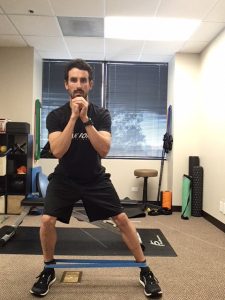
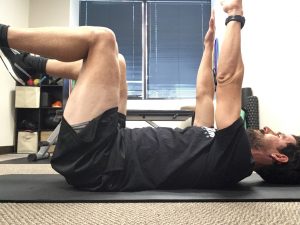
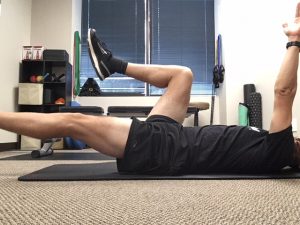
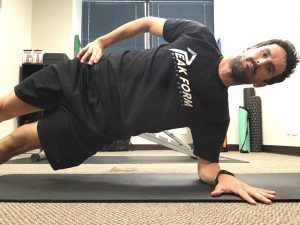
  • Maintain a Self Care Program– After being screened by a Sports Chiropractor and prescribed exercises, it is important that you do them! A daily routine of foam rolling, stretching, strengthening to the areas that have been causing injury. Daily is best but if you can squeeze in 3 times per week to manage triathlon injuries, you will see positive results.IT band syndrome San Diego, Gait San Diego
  • Sleep– It is important when training to stick to an appropriate sleep schedule. Getting quality sleep allows your body to regenerate after you break it down during hard training. In a nutshell, deep sleep allows growth hormone and other rebuilding hormones to be released which will allow you to bounce back faster. If sleep is constantly sacrificed for more work, or more training, the body will become catabolic and slowly break down. When trying to manage triathlon injuries, if you do not allow the body to rebuild, the injuries will never fully heal.
  • Nutrition-  Proper nutrition gives the building blocks to your body to allow for proper recovery.  The more high quality fuel you give yourself, the high quality output and recovery you will get. Just like a sports car, you will not put regular unleaded gas in tank, you will put premium gas in to get the most out of the high performance engine. In general, high quality carbohydrate (lots of veggies, whole grains), lean proteins, and plenty of healthy fats are what you want to strive for! After exercise sessions, especially high intensity interval sessions, drink a mixture of carbohydrate and protein to refuel the glycogen stores in the muscles. 
  • Periodization- We see countless athletes in our office who suffer from over training syndrome. A lot of it stems from the fear of not doing enough to get ready for a race or losing too much fitness between exercise sessions. With a proper training plan in place, you will become fitter, faster, and having to manage triathlon injuries will become a thing of the past. In short, get an experienced coach, or at the very least get a training book and follow it.

Those are the top 5 tips to help manage triathlon injuries and avoid new injuries moving forward. We recommend getting a physical assessment by one of our sports chiropractors located in Mission Valley, San Diego. We are located near the neighborhoods of Hillcrest, Serra Mesa, Clairemont Mesa, La Mesa, Pacific Beach, Ocean Beach, and Point Loma. Our Sports Chiropractors are trained in musculoskeletal diagnosis and treatment, running gait analysis, bike fitting, and can order the proper diagnostic tests if necessary (MRI, X-ray, etc.).


Dr. Travis Rose, DC CCSP and Dr. Kevin Rose DC DACBSP are both avid triathletes and are passionate about helping triathletes manage triathlon injuries. Knowing first hand how frustrating a nagging injury can be, both Dr. Travis and Kevin utilize Active Release Treatments and chiropractic treatments to keep them healthy and performing at their best!

Outer hip pain running clinic San Diego

Outer Hip Pain in Runners

Outer hip pain is a very common complaint we see with out runners at our Mission Valley office. The outer hip musculature is designed to provide hip, and lower back stabilization during running. When there is pain or tightness at the outer hip, the stability at the hip and lower back is compromised. This in turn can create abnormal stress into the hip, outer hip muscles, lower back, the knee, and even the lower leg/foot. The following conditions cause outer hip pain and dysfunction:

Causes of Outer Hip Pain

  • Glute Medius Muscle Strain
  • Tensor Fascia Latae Strain
  • Gluteus Medius Tendinopathy
  • Trochanteric Bursitis
  • Iliotibial Tract Syndrome (IT Band Syndrome)
  • Sciatic Nerve Entrapment

As mentioned above, the out hip plays a role in lower back and hip stability. If the outer hip is painful or dysfunctional the following conditions may also be present:

  • Low Back Pain
  • Facet Joint (Lower Back Joint) Irritation
  • Hip Impingement
  • Knee Tracking Issues
  • Outer Knee Pain (IT Band Syndrome)
  • Shin Splints
  • Plantar Fasciitis

Evaluation

It is important to be evaluated by a running doctor and sports chiropractor. We will help diagnose your outer hip pain and any potential compensatory injuries that may be occurring simultaneously.  A combination of range of motion, orthopedic, functional movements, and strength/endurance tests will be used to pinpoint the exact cause of your pain.

Gait Analysis

We currently offer at home gait analysis for current patients. After being evaluated in our office, if it is deemed necessary, we have our patients video tape themselves running on a treadmill and send it back to us for evaluation. For outer hip pain, many runners with outer hip pain run with what is known as a cross over gait. Check out our previous blog posts here on what a cross-over gait consists of.

Hip pain Running San Diego

Potential sites for injury with cross over gait

Treatment for Outer Hip Pain

Active Release Technique is an excellent tool for helping runners with outer hip pain get out of pain quickly. A targeted home rehab approach is then prescribed b our running doctor as a way to prevent the injury from coming back again. Schedule with us today at our Mission Valley, San Diego running injury clinic today!

Knee Pain Running Doctor

Anterior Knee Pain and Running

Pain in front of the knee is a common complaint that runners seek advice for from a running doctor. There are many conditions that can cause anterior knee pain including:

  • Patellar tendinitis/tendinosis
  • chondromalacia
  • Patella tracking issues
  • Quadriceps strain
  • Hip flexor strain
  • Capusular ligament sprain
  • Meniscus injury
  • Fat pad syndrome
  • Osgood Schlatter’s disease

It is important to seek treatment from a sports physician and running doctor to get a correct diagnosis, and begin correct treatment immediately.

Knee pain running doctor San Diego

What to expect at your appointment

At our Mission Valley office, our running doctor will take a thorough history of the running injury. After the history is completed an exam will occur which will include some or all of the following: range of motion, orthopedic, neurologic, functional movement, and strength/endurance tests.

Gait analysis is another important aspect for certain running conditions. We currently offer remote gait analysis where current patients can take a treadmill video of themselves running, then email it to our running doctor for evaluation. General recommendations for running technique can be found on our blog here: Increase your Cadence, and Improve Running Posture

Treatment for anterior knee pain

A combination of Active Release Technique, Graston Technique, and a home exercise program resolves many cases of anterior knee pain. We see significant results within 4-8 visits. Our goal is to our runners back to running pain free as soon as possible and have exercises to do to prevent the injury from reoccurring.

If you have been dealing with anterior knee pain during your training, please call our Mission valley office to schedule today. Our running doctors are certified to treat running injuries and get you back to running pain free fast!

Dr. Travis Rose DC is a certified health professional through The Running Clinic. Both Dr. Kevin Rose DC DACBSP and Dr. Travis Rose DC CCSP have treated hundreds of runners including Boston marathon qualifiers, and Olympic trial marathon runners.

IT band syndrome exercises san diego

Cross-Over Gait Correction

Some of the links in this post are affiliate links. We may earn an affiliate commission if you click on a link and purchase an item we recommend. This doesn’t add any additional cost to you, but helps support our business.

How to Fix a Cross-Over Gait

The best way to work on crossover gait is to perform running drills! Many runners are simply unaware that they run with a cross-over gait. Specific running drills to address a this type of gait will significantly improve running efficiency and decrease risk for injury. At our Mission Valley sports injury clinic, we stress the importance of running drills to all of our running patients.

There are three main drills that significantly reduce cross-over gait: increasing cadence, running wider, and activating the hip stabilizers while moving through gait.

  1. Cadence– I talk extensively about cadence in our blog post here. In a nutshell, by increasing running cadence, there is less time for your feet to travel across midline.  Slow cadence allows more time for your feet to creep over midline.
  2. Run wide using a track line– Run around a track with lane lines (or white bicycle lane line). Run so the line is in the middle of your body. The goal is to land with the inner right foot touching the right outer border of the line and vice versa for the left foot. It may feel like you are running VERY wide but with practice it will feel more normal. Practice this drill on the straight away on the track about 4-6 times. Over time you will start to run wider naturally.
  3. Walking hip hikers– The goal is to activate the gluteal muscles, and hold while taking a step. This builds the mind body connection to the hip/core muscles while moving during gait. Watch the video below for a detailed look at the walking hip hiker.

What About Increasing Core Strength?

Core and gluteal strengthening drills alone will not magically get rid of a cross-over gait; again working on correcting the gait will do that. That being said, working on the core and gluteal muscles in conjunction with gait retraining, will support proper running gait. The stronger the supporting muscles are, the more capable they are to resist fatigue during workouts and races. Some runners have no issues with their gait for runs between 3 and 10 miles. Once long runs increase to the 12, 14, 16 mile range, gait issues begin to occur. In this scenario, strengthening workouts to the core and gluteal muscles are paramount to avoid running form breakdown during longer runs. Here are a few of our favorite core and gluteal strengthening exercises:

Gluteal bridge

Lay flat on your back, knees bent, and feet flat on the floor just wider than hip width apart. Brace your abdomen to engage the core. Press through your heels to lift the pelvis upward until it is in line with the knees and shoulders. Avoid arching through the back. Add a band around the knees for more gluteal activation. Sets: 3 Reps: 10-20

Bridges improve core and gluteal muscle strength, important for running               Bridges improve core and gluteal muscle strength, important for running

Monster walking 

Place a medium resistance mini-loop band around the ankles. Spread feet shoulder width apart and sit into a shallow squat, keeping your core engaged. Step forward and slightly outward with one foot and then repeat with the other. Take 5-10 steps forward and 5-10 steps backward. Continue until you feel a good exercises burn in the muscles of the outer hip. Sets: 3 Reps: Go until it burns

Walking with a band strengthens the gluteus medius muscle to improve hip and low back stability               Walking with a band strengthens the gluteus medius muscle to improve hip and low back stability

Crab walking     

Place a medium resistance mini-loop band around the ankles. Spread feet shoulder width apart and sit into a shallow squat, keeping your core engaged. Take a step to the side, then take the same distance step with the other foot in the same direction; important to not over step inward with the follow up step as this looses tension in the band. Take 5-10 steps one direction and 5-10 steps back in the other direction. Continue until you feel a good exercises burn in the muscles of the outer hip. Sets: 3 Reps: Go until it burns

Walking with a band strengthens the gluteus medius muscle to improve hip and low back stability               Walking with a band strengthens the gluteus medius muscle to improve hip and low back stability

Dead bug

Lay on your back, with your knees and hips bent to 90 degrees and arms held straight in front of shoulder. Brace your core by squeezing back and abdominal muscles. Slowly lower one leg towards the ground, resisting the back from arching up off the ground. Alternate legs keeping a slow pace the entire time. If this version of the dead bug is too difficult, keep the knee bent when moving the leg and perform heel taps. Sets: 3 Reps: 10 per leg

Dead bug improves lumbo-pelvic muscle control important for running               Dead bug improves lumbo-pelvic muscle control important for running

Side plank

Begin by laying on your side with the elbow tucked underneath the shoulder and feel sacked. Keep the body as straight as possible and lift the pelvis off the ground. Focus on contracting the muscles on the side closest to the floor. Perform the side plank on both sides. Sets: 3 Reps: 1 Hold: 30-60 seconds

Side plank improves lateral core stability which is important for running

Self Myofascial Release to the Gluteal muscles

Take a look at the video below. By using a lacrosse/massage ball into the muscles, muscle tension will decrease which can help with soreness, pain, tightness in the area.

These strategies help with correcting a cross-over gait. If you are experiencing shin, knee, hip, back, or foot pain from running, I highly recommend getting the injury evaluated. A targeted approach to your specific injury can prevent time lost to injury. At our Mission Valley office, we perform Active Release Technique, Graston technique, and rehabilitative exercise to keep our endurance athletes competing pain free!

Preventing Soccer Injuries

Preventing Soccer Injuries

Soccer is an excellent way to build endurance, improve speed and stay in shape, all while enjoying being a part of a team. Nevertheless, soccer does involve quick start-and-stop motions and physical contact, which can lead to injury. The risk of injury is no reason not to play soccer however. Players simply need to be aware of the risks and know what steps they can take to play as safely as possible.

Sprains and strains are very common injuries in soccer, with varying forms of severity. Other injuries could include stress fractures and muscle strains from repeated overuse and direct blows to the body. Soccer players are also prone to shin splints, patellar tendinitis, and Achilles tendinitis. These injuries occur in the lower extremities, whereas neck sprains and concussions are common in the upper extremities. Injuries to the head, neck face are sometimes unavoidable. Just like wrist sprains, fractures and shoulder dislocations are unfortunately common due to falls and player-to-player contact.

The best place to start in prevention of these injuries is to have a pre-season physical examination and follow your doctor’s recommendations during the season. Using well-fitting cleats and shin guards is important in prevention. Molded and multi-studded cleats may be safer than screw-in cleats. Stay hydrated when out on the field and maintain proper fitness throughout the sport’s season. Injury rates are known to be higher in athletes who have not adequately prepared physically and remember to stretch adequately before and after your time on the field. After being inactive in the sport, progress gradually back to full-contact soccer through activities such as aerobic conditioning, agility training, and strength training.

Some of the greatest advice in preventing soccer injuries is to avoid overuse injuries. When it comes to the health of your body, more is not always better. Many sports medicine experts believe that it is helpful to take at least one season off each year. Although it’s hard, try to avoid the pressure that is now forced on many young athletes to over-train. Always listen to your body and decrease training time and intensity if pain or discomfort continues to increase. It will reduce the risk of injury and help avoid “burn-out.” Most injuries can be prevented to an extent. The last thing anyone wants to do is put an early end to his/her soccer career because they didn’t listen to their body and take care of themselves. As always, speak with a sports medicine professional if you have any concerns about injuries or soccer injury prevention strategies.

In order to keep kids and adults out on the field long-term and enjoy the sport of soccer, injury prevention, early detection, and treatment are significantly important.

Debunked Workstation Myths

Debunked Workstation Myths

There are many commonly accepted guidelines for a safe and comfortable workstation that are actually myths. Some postures and furniture can actually harm you and lead to discomfort, if rigidly followed. These debunked workstation myths will help you to manage the health risks of your home or work office:


Debunked Workstation Myths


Myth #1: Sitting correctly at a desk will eliminate discomfort and reduce injuries.

Debunked Workstation Myths
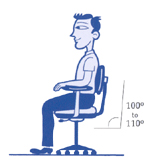
In actuality, sitting with picture-perfect posture for long periods of time can actually lead to more discomfort, as it is extremely fatiguing. It can also lead to joint-pain and muscle strain because the torso is placing constant pressure on the lower disks in your back. Even in the ergonomically correct position, your arms and hands can still incur injuries. Any time you are sitting or standing in a static position, you increase the risk of prolonged physical conditions. To avoid any injuries at your workstation, try alternating between sitting and standing while working. Choose dynamic positions that will increase blood flow and alleviate stiff muscles. Also, include small rest breaks and stretch frequently to help avoid injuries.


Myth #2: Always sit upright, and never recline at the workstation.

4 out of 5 workers would prefer to recline their chair slightly when working. In fact, a reclined position creates much less fatigue than sitting upright. Being slightly reclined is also much easier to maintain and alleviates gravitational pressure on the lower disks in the back. However, be cautious to avoid slouching, which can cause injuries from a lack of sufficient back support.


Myth #3: Ergonomic chairs are one-size fits all.

A single chair size won’t fit every shape and size. Women are shaped differently than men, and their hips are generally wider. Men usually have longer legs and consequently will need a deeper seat. There are many different body types, and each one requires a different seating solution. In addition, different chairs are appropriate for different tasks. When selecting an ergonomic chair, consider the tasks you will be doing and your body size and shape.


Myth #4: Adjust the chair height according to the table height.

Unfortunately, this is not always the case. Although it may seem like a simple solution, this does not always result in a safe sitting position. Instead, keep your chair at the appropriately adjusted position for your body type. If your chair is too low, it can add extra pressure to your legs and back. If the chair is set too high, it can result in discomfort from your feet dangling. You can get a footrest to avoid this, but the best way to avoid injuries is to adjust the table height or the task at hand.

Many people don’t realize that these commonly believed workstation postures are in fact myths. By educating yourself with the above recommendations, you can avoid unnecessary workstation injuries and added discomfort.

Ergonomic Chair Setup

Comfortable desk work begins with proper chair setup. Follow these helpful tips to ensure a proper ergonomic chair setup.

Chair Setup

  • Push your hips as far back as they can go in the chair.
  • Adjust the seat height so your feet are flat on the floor and your knees are equal to, or slightly lower than, your hips.
  • Sometimes the desk height forces you to have the chair higher than you what will allow you to touch the ground.  If your feet don’t reach the ground put a small box under your desk to rest your feet on.
  • The back of the chair should be at a 100°-110° reclined angle which should create an angle between your body and your thighs of 90° -100°.

    Step 1 Chair.

    From UCLA Ergonomics

  • Make sure your upper and lower back are supported. Use extra cushions at the small of your back if your chair does not have adequate support.
  • Adjust the armrests so that your shoulders are down and relaxed.
  • If your armrests prevent your shoulders from being in a relaxed position, remove them.
  • Keep your body straight with the head and neck upright and looking forward, not to the side. Do not hunch over or slouch.

OTHER TIPS

  • Don’t cross your legs while sitting. This can cut off circulation and/or lead to hip problems.
  • Make sure your chair seat has a soft, downward curved edge so that it does not dig into the back of your thighs. This can also cut off circulation.
  • When purchasing a chair the best feature is its ability to adjust each component separately.
  • If sitting is too painful, consider a standing workstation.


Next post “Ergonomic Keyboard and Mouse Setup”

Best Chiropractor in Mission Valley


Congratulations to Dr. Rose, DC on being voted 2012 Best Chiropractor in Mission Valley by Mission Valley News.

Click Here for the entire release.

Mission Valley News offers community news and information on Mission Valley, Old Town, Linda Vista and surrounding areas.

Sciatic Nerve Glide

Piriformis Syndrome Part III- Treatment

Piriformis Syndrome Treatment

The two main goals of treatment are 1) to relief irritation to the sciatic nerve and 2) address any functional problems that may be contributing.
If the sciatic nerve is inflamed the first step is to decrease aggravation from compression. Things to avoid are leg crossing, sitting on your wallet, and sitting on hard surfaces.  Things you should begin doing are applying ice to the piriformis, stretching of the piriformi, and taking oral anti-inflammatories (as directed).  Stretching every 2-3 hours (while awake) is a key to the success of non-operative treatment. Prolonged stretching of the piriformis muscle is accomplished in while lying on your back with the hip flexed and passively adducted/internally rotated (see picture).  Another exercise that can be helpful to decrease irritation between the piriformis and sciatic nerve is a nerve gliding exercise.  This exercise tensions the sciatic nerve and allows it to move relative to the piriformis. It is sometimes called nerve flossing to better describe how the nerve moves through other structures.  Two types of nerve gliding exercises are pictured below. (Pictures from http://www.dynamicchiropractic.com/mpacms/dc/article.php?id=53203)
 Sciatic Nerve GlideSciatic Nerve Tensioner
Manual therapy can be extremely helpful in releasing tension on the sciatic nerve and addressing functional deficits.  Soft tissue therapies, including myofascial release and Graston®, aimed at releasing tension and muscular adhesions within the piriformis can be beneficial.  Chiropractic spinal adjustments can help address functional contributions from the spine such as sacroiliac joint hypomobility and low back dysfunction.  Hyperpronation of the foot can be addressed through orthotics in the short term and foot strengthening in the long term.  Pronation is a normal foot motion however overpronation may lead to increased external rotation of the hip with walking putting tension on the piriformis and sciatic nerve.
Treatment may take several months of consistent work and it is important not to get discouraged. As long as there is no progression of neurological symptoms conservative treatment is the best option. Your symptoms should be monitored by a healthcare practitioner to ensure there is no progression.
-Dr. Kevin Rose, DC
Q Angle

Piriformis Syndrome Part II- Evaluation

Clinical Diagnosis

Piriformis syndrome occurs most frequently between ages 40-60 and is more common in women than men.  Some reports suggest a 6:1 female-to-male ratio for piriformis syndrome; , possibly because of biomechanics associated with the wider quadriceps femoris muscle angle (ie, “Q angle”) in the pelvis of women. Reported incidence rates for piriformis syndrome among patients with low back pain vary widely, from 5% to 36%.

Q-Angle

The most common  symptom of patients with piriformis syndrome is increasing pain after sitting for longer than 15 to 20 minutes. Many patients complain of pain over the piriformis muscle (ie, in the buttocks), especially over the muscle’s attachments at the sacrum and medial greater trochanter. Symptoms, which may be of sudden or gradual onset, are usually associated with spasm of the piriformis muscle or compression of the sciatic nerve; these symptoms include radiating/shooting pain or tingling or numbness in the back of the thigh, leg, or foot.  These symptoms must be evaluated by a healthcare provider to differentiate the possible causes.  Patients may also complain of difficulty walking and of pain with internal rotation of the involved leg, such as occurs during cross-legged sitting or walking. X-rays or an MRI offer little help in directly diagnosing piriformis syndrome but may be used to rule out other causes of sciatica such as a herniated disc in the lumbar spine.

Functional Evaluation

There are many functional abnormalities that may have either caused or resulted from this condition.  Once the diagnosis has been made, these underlying, perpetuating biomechanical factors must be addressed.

Functional biomechanical deficits associated with piriformis syndrome may include the following:

  • Tight hip external rotators including pirifromis
  • Tight adductors (groin)
  • Hip abductor weakness
  • Lower lumbar spine dysfunction
  • Sacroiliac joint hypomobility
  • Hyperpronation of the foot and prolonged toe-off

Functional adaptations to these deficits include the following:

  • Ambulation with the thigh in external rotation
  • Functional limb length shortening
  • Shortened stride length

Next post will discuss treatment options for piriformis syndrome