Posts

whiplash san diego

Chiropractic and Whiplash – San Diego

Whiplash is the medical name for an injury to the neck that is created from a sudden jolt from front to back that creates a whip style movement. Whiplash is more often sustained in motor vehicle accidents; however, it can occur from a fall or sports/work related injury and so forth. The Whiplash injuries are normally due to the result of a sprain-strain to the neck, where the ligaments which provide support, protection and also limit the movement of the vertebrae are damaged. The most commonly injured joints are the facet joints which are located in the back portion of the spine. However, these are usually not the only injuries.

With more severe whiplash injuries tendons and muscles are strained and stretched, vertebral discs can be bulge or herniate, and the nerves may also suffer stretching and become irritated and inflamed. The most common symptoms that are felt with whiplash are stiffness and pain through the neck, generally found in the areas that have sustained damage. Most commonly pain will be in the front and back of the neck and turning the head will make the pain more severe. A headache is also a normal symptom of whiplash. Pain can also be found to extend through the upper part of the body.

In addition to the joint pain, some people experience dizziness, sickness, and even visual problems following a whiplash injury. These symptoms must not be ignored, and medical intervention should be sought if they do not resolve in a day or two. Whiplash symptoms are not always immediate and can take up to two days to appear.

Those suffering from whiplash need to stay active unless they have sustained an injury that requires immobilization. They may be worried but should move as much as possible. The doctor will more than likely prescribe some form of stretching exercises. These exercises are very important to aid recovery.

It is normal to use ice or heat to control the pain and reduce swelling after a whiplash injury. The injured party may also have electrical stimulation or ultrasound if necessary for short term relief. In the case of neck pain, spinal manipulation or spinal mobilization from a chiropractor can provide additional relief.

Active Release Technique

The Power of ART – Active Release Technique

Struggling with carpal tunnel can be a debilitating experience. The inflammation around tissues and nerves in the wrist can make it difficult to perform daily tasks. The classic symptoms of carpal tunnel include numbness or pain that occurs on the thumb-side of the hand, pain that radiates up to the shoulder, and the muscles in the thumb becoming severely distorted. However, there is no need to suffer with this condition when there is ART (Active Release Technique) to help you relieve the symptoms.

One can experience the relief of the pain and numbness without invasive surgery or traditional procedures of medicine. The continuance of these symptoms is the direct result of misdiagnosis and the misinterpretation of what carpal tunnel actually is. It’s more than just the entrapment of one single nerve in the thumb; rather, it’s a more common problem that takes place further up the arm, in the muscle called the Pronator Terres. Because of this, adding a brace to the wrist can actually make the problem worse.

ART, on the other hand, is designed to eliminate the problem from the get-go, allowing patients to make a much faster recovery than with conventional methods. Instead of focusing on just one area, ART aims to restore unimpeded range of motion and function to the soft tissues of the arm and wrist.

Professionals who are trained in the technique of ART can evaluate the texture and mobility of soft tissue, and, using hand pressure, removes or breaks up the fibrous adhesions that are present in the soft tissues. This can drastically improve the recovery from this debilitating condition, and abate the symptoms for much longer periods of time between each treatment.

There are typically three levels of ART that are performed by the practitioner himself while the fourth requires the patient to be involved with the active movement of the tissue while the practitioner applies the required tension to improve the results of the treatment even more. It has been scientifically proven that patients who are actively involved with the process of their treatment are more likely to make a better recovery than those who don’t.

Understand the true source of the pain you’re experiencing, and take steps to resolving your condition before it becomes too much to handle.

Debunked Workstation Myths

Debunked Workstation Myths

There are many commonly accepted guidelines for a safe and comfortable workstation that are actually myths. Some postures and furniture can actually harm you and lead to discomfort, if rigidly followed. These debunked workstation myths will help you to manage the health risks of your home or work office:


Debunked Workstation Myths


Myth #1: Sitting correctly at a desk will eliminate discomfort and reduce injuries.

Debunked Workstation MythsIn actuality, sitting with picture-perfect posture for long periods of time can actually lead to more discomfort, as it is extremely fatiguing. It can also lead to joint-pain and muscle strain because the torso is placing constant pressure on the lower disks in your back. Even in the ergonomically correct position, your arms and hands can still incur injuries. Any time you are sitting or standing in a static position, you increase the risk of prolonged physical conditions. To avoid any injuries at your workstation, try alternating between sitting and standing while working. Choose dynamic positions that will increase blood flow and alleviate stiff muscles. Also, include small rest breaks and stretch frequently to help avoid injuries.
 

Myth #2: Always sit upright, and never recline at the workstation.

4 out of 5 workers would prefer to recline their chair slightly when working. In fact, a reclined position creates much less fatigue than sitting upright. Being slightly reclined is also much easier to maintain and alleviates gravitational pressure on the lower disks in the back. However, be cautious to avoid slouching, which can cause injuries from a lack of sufficient back support.


Myth #3: Ergonomic chairs are one-size fits all.

A single chair size won’t fit every shape and size. Women are shaped differently than men, and their hips are generally wider. Men usually have longer legs and consequently will need a deeper seat. There are many different body types, and each one requires a different seating solution. In addition, different chairs are appropriate for different tasks. When selecting an ergonomic chair, consider the tasks you will be doing and your body size and shape.


Myth #4: Adjust the chair height according to the table height.

Unfortunately, this is not always the case. Although it may seem like a simple solution, this does not always result in a safe sitting position. Instead, keep your chair at the appropriately adjusted position for your body type. If your chair is too low, it can add extra pressure to your legs and back. If the chair is set too high, it can result in discomfort from your feet dangling. You can get a footrest to avoid this, but the best way to avoid injuries is to adjust the table height or the task at hand.

Many people don’t realize that these commonly believed workstation postures are in fact myths. By educating yourself with the above recommendations, you can avoid unnecessary workstation injuries and added discomfort.

Selecting The Best Office Chair

Selecting the Best Office Chair

Not all chairs fit all body types. When selecting the best office chair for your workstation, there are a few different factors that you should keep in mind. When sitting in a chair, your back will be most comfortable in a slightly reclined and neutral position. Each element of the chair should help you maintain this neutral position.

What To Look For When Selecting the Best Office Chair


Seat

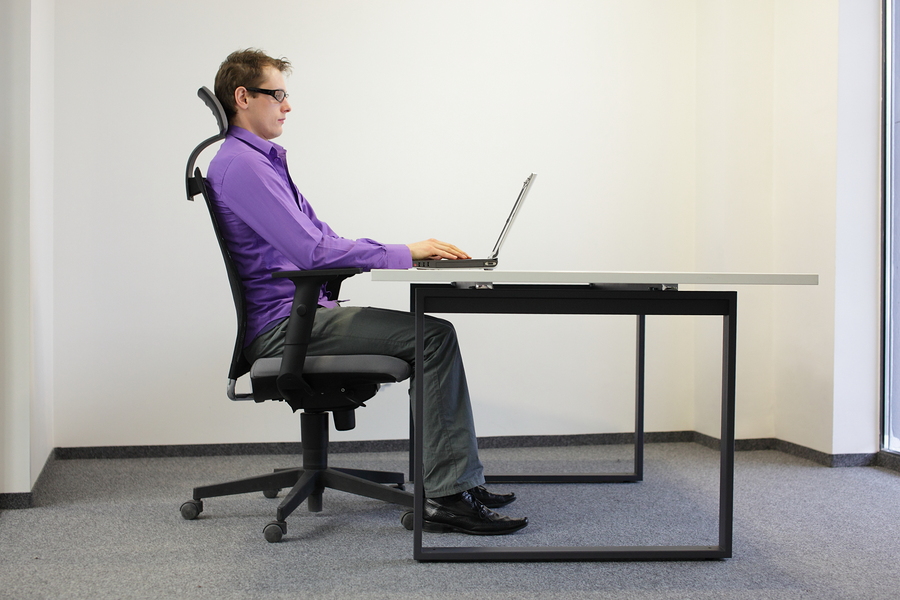
Selecting The Best Office ChairThe key to choosing the right chair is the ability to adjust the seat depth, height, and tilt. Choose a seat depth that supports your hips and legs, and look for a chair with sliding seat options. There should be a 1-2” space between the back of your knees and the front of the seat. The height of the chair needs to adjust according to your height. Your feet should be flat on the ground when your hips are pushed to the back of the seat, and you should be able to tilt the chair back to recline or sit upright. A reclining mechanism can also help with increasing movement while working.
Backrest

Back support is very important when selecting an ergonomic chair. The chair should provide lumbar support for your lower back. If this is missing, it can lead to slouching and strain on the back. The back of the chair should allow for height and angle adjustments. The contour of the backrest should allow for free arm movements while still supporting the upper and lower back. If you tend to recline often, you may need a backrest that supports your shoulders and neck. The angle of the backrest should adjust independently from the seat at a 100° to a 110° angle.


Armrests

When your shoulders are relaxed, your forearms should be able to rest on the armrests fully and comfortably. Adjust the armrest inward or outward to affect the width based on your stature. Armrests can support your upper back when taking breaks from typing.
A single chair or adjustment may not be applicable for all tasks, so you may need to experiment with different chairs or adjustments. The goal of an ergonomic chair is to provide you with the comfort and support your body needs.

Ergonomic Desk Guide

Your Guide to a Fully Ergonomic Workstation

If you spend a lot of time sitting at your work desk, it can actually cause some serious health issues if the workstation is not set up properly. Here are some easy adjustments you can make to ensure that you will maintain a healthy posture at an ergonomic workstation.

This is your guide to a fully ergonomic workstation:


Chair

Ergonomic Desk Guide

  • Sit on your chair with your hips completely pushed to the back of the seat.
  • Adjust your chair height so that your feet are flat on the ground.
  • Your knees should be level to your hips or slightly lower than your hips.
  • Recline the back of the chair so that it is at a 100°-110° angle.
  • Support your lower back with a by using an inflatable cushion or a small pillow for extra support. You can also add on a lumbar support to your chair.
  • Set the arm rests at a height where your shoulders are able to relax comfortably on them. Another option is to remove the arm rests altogether.


Keyboard

  • Position the keyboard so that it is directly in front of you and centered with your body.
  • Sit closely to your keyboard to avoid overreaching.
  • While your shoulders are relaxed, position the keyboard so that your arms are at a 100° angle. Ensure that your wrists and hands are straight.
  • If you need to tilt your keyboard up, make sure that your chair reclines so that you are still at a 100° angle.
  • If you’d like to use a palm support, make sure that you don’t let your palms rest on it while typing, as this is not recommended. Additionally, try to keep your wrists slightly elevated when typing.
  • Keep your mouse as close as you can to the keyboard. It should also be at the same level as the keyboard.
  • If you need to adjust your seat height to accommodate the keyboard, keep a footrest under your desk for your feet to rest on. This way your feet will not be left dangling.


Computer Monitor

  • Adjust the monitor to keep your head in a neutral position when working.
  • The top of the monitor should be around 2 to 3 inches higher than eye-level when seated.
  • Your screen should be at least an arms length away.
  • Reduce glare and reflections on your computer screen by adjusting the monitor’s positioning.
  • If you are using a laptop, place it on an adjustable stand, and use an external keyboard and mouse.


Phone

  • Keep your phone as close to you as possible.
  • Wear a headset when possible to avoid holding the handset with your shoulder.


In addition to these guidelines, try to avoid slouching and leaning as much as possible, and don’t forget to take 1-2 minute breaks to stretch every 20-30 minutes. No matter how ergonomically correct your workstation is, sitting for prolonged period of time in a static position can significantly decrease blood circulation which can lead to other health risks. Take the time to set up your workstation the right way. By following this quick guide to a fully ergonomic workstation, you will be able to work safely and comfortably.

Ergonomic Chair Setup

Comfortable desk work begins with proper chair setup. Follow these helpful tips to ensure a proper ergonomic chair setup.

Chair Setup

  • Push your hips as far back as they can go in the chair.
  • Adjust the seat height so your feet are flat on the floor and your knees are equal to, or slightly lower than, your hips.
  • Sometimes the desk height forces you to have the chair higher than you what will allow you to touch the ground.  If your feet don’t reach the ground put a small box under your desk to rest your feet on.
  • The back of the chair should be at a 100°-110° reclined angle which should create an angle between your body and your thighs of 90° -100°.

    Step 1 Chair.

    From UCLA Ergonomics

  • Make sure your upper and lower back are supported. Use extra cushions at the small of your back if your chair does not have adequate support.
  • Adjust the armrests so that your shoulders are down and relaxed.
  • If your armrests prevent your shoulders from being in a relaxed position, remove them.
  • Keep your body straight with the head and neck upright and looking forward, not to the side. Do not hunch over or slouch.

OTHER TIPS

  • Don’t cross your legs while sitting. This can cut off circulation and/or lead to hip problems.
  • Make sure your chair seat has a soft, downward curved edge so that it does not dig into the back of your thighs. This can also cut off circulation.
  • When purchasing a chair the best feature is its ability to adjust each component separately.
  • If sitting is too painful, consider a standing workstation.


Next post “Ergonomic Keyboard and Mouse Setup”

Best Chiropractor in Mission Valley


Congratulations to Dr. Rose, DC on being voted 2012 Best Chiropractor in Mission Valley by Mission Valley News.

Click Here for the entire release.

Mission Valley News offers community news and information on Mission Valley, Old Town, Linda Vista and surrounding areas.

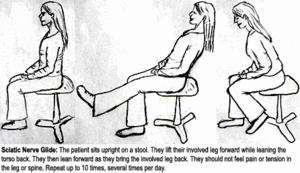
Sciatic Nerve Glide

Piriformis Syndrome Part III- Treatment

Piriformis Syndrome Treatment

The two main goals of treatment are 1) to relief irritation to the sciatic nerve and 2) address any functional problems that may be contributing.
If the sciatic nerve is inflamed the first step is to decrease aggravation from compression. Things to avoid are leg crossing, sitting on your wallet, and sitting on hard surfaces.  Things you should begin doing are applying ice to the piriformis, stretching of the piriformi, and taking oral anti-inflammatories (as directed).  Stretching every 2-3 hours (while awake) is a key to the success of non-operative treatment. Prolonged stretching of the piriformis muscle is accomplished in while lying on your back with the hip flexed and passively adducted/internally rotated (see picture).  Another exercise that can be helpful to decrease irritation between the piriformis and sciatic nerve is a nerve gliding exercise.  This exercise tensions the sciatic nerve and allows it to move relative to the piriformis. It is sometimes called nerve flossing to better describe how the nerve moves through other structures.  Two types of nerve gliding exercises are pictured below. (Pictures from http://www.dynamicchiropractic.com/mpacms/dc/article.php?id=53203)
 Sciatic Nerve GlideSciatic Nerve Tensioner
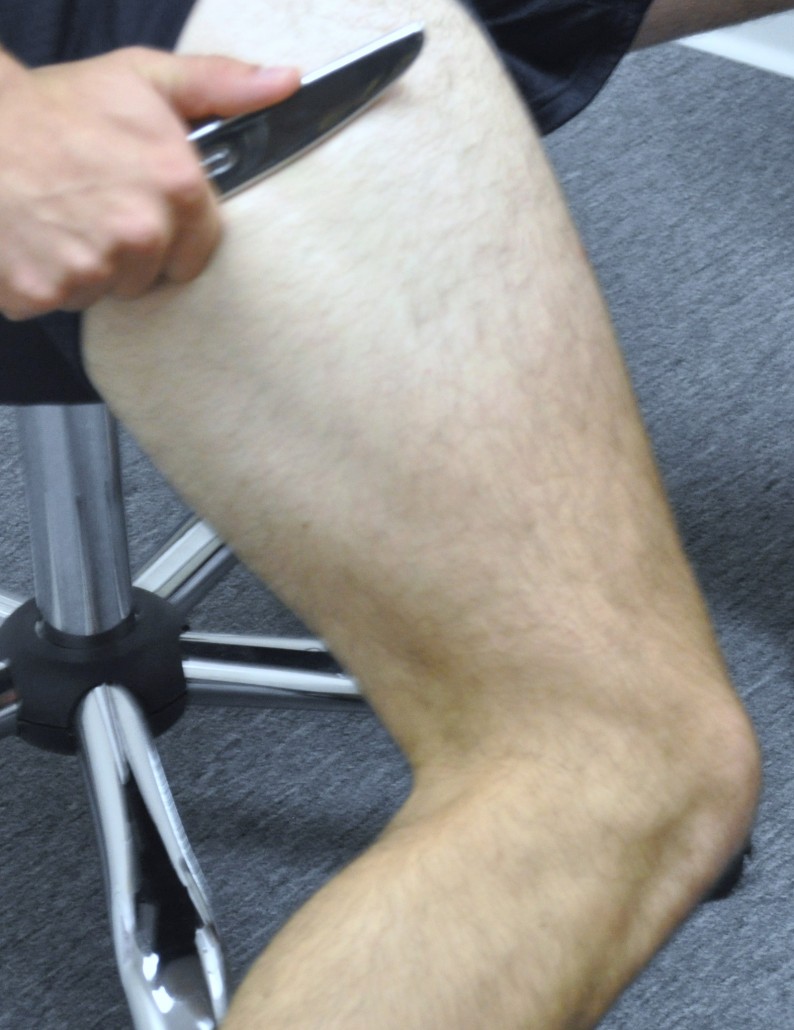
Manual therapy can be extremely helpful in releasing tension on the sciatic nerve and addressing functional deficits.  Soft tissue therapies, including myofascial release and Graston®, aimed at releasing tension and muscular adhesions within the piriformis can be beneficial.  Chiropractic spinal adjustments can help address functional contributions from the spine such as sacroiliac joint hypomobility and low back dysfunction.  Hyperpronation of the foot can be addressed through orthotics in the short term and foot strengthening in the long term.  Pronation is a normal foot motion however overpronation may lead to increased external rotation of the hip with walking putting tension on the piriformis and sciatic nerve.
Treatment may take several months of consistent work and it is important not to get discouraged. As long as there is no progression of neurological symptoms conservative treatment is the best option. Your symptoms should be monitored by a healthcare practitioner to ensure there is no progression.
-Dr. Kevin Rose, DC
Q Angle

Piriformis Syndrome Part II- Evaluation

Clinical Diagnosis

Piriformis syndrome occurs most frequently between ages 40-60 and is more common in women than men.  Some reports suggest a 6:1 female-to-male ratio for piriformis syndrome; , possibly because of biomechanics associated with the wider quadriceps femoris muscle angle (ie, “Q angle”) in the pelvis of women. Reported incidence rates for piriformis syndrome among patients with low back pain vary widely, from 5% to 36%.

Q-Angle

The most common  symptom of patients with piriformis syndrome is increasing pain after sitting for longer than 15 to 20 minutes. Many patients complain of pain over the piriformis muscle (ie, in the buttocks), especially over the muscle’s attachments at the sacrum and medial greater trochanter. Symptoms, which may be of sudden or gradual onset, are usually associated with spasm of the piriformis muscle or compression of the sciatic nerve; these symptoms include radiating/shooting pain or tingling or numbness in the back of the thigh, leg, or foot.  These symptoms must be evaluated by a healthcare provider to differentiate the possible causes.  Patients may also complain of difficulty walking and of pain with internal rotation of the involved leg, such as occurs during cross-legged sitting or walking. X-rays or an MRI offer little help in directly diagnosing piriformis syndrome but may be used to rule out other causes of sciatica such as a herniated disc in the lumbar spine.

Functional Evaluation

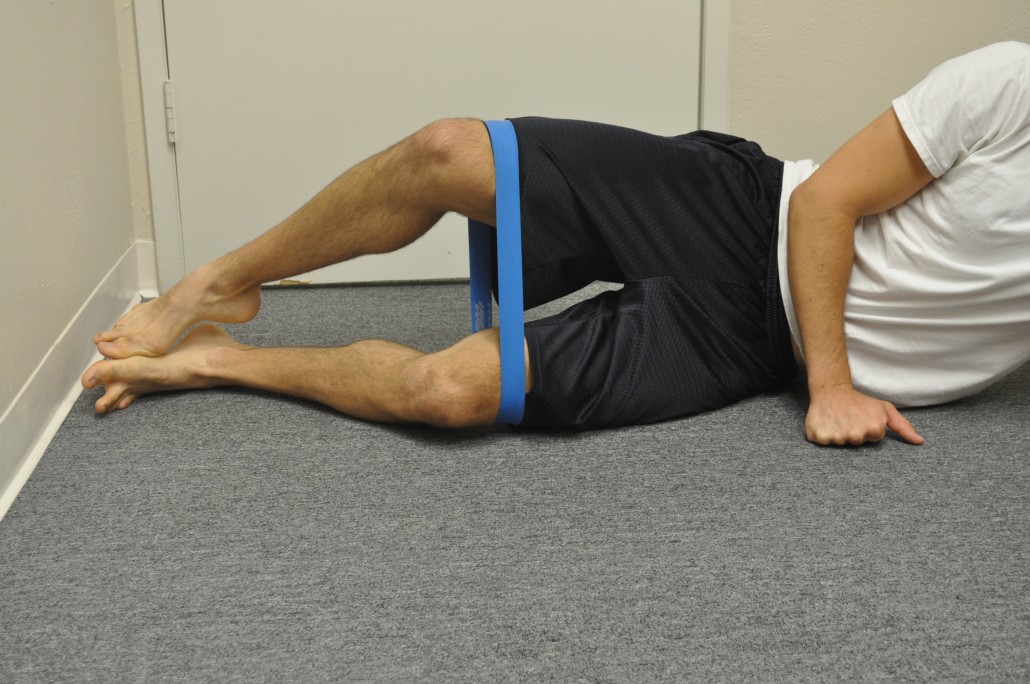
There are many functional abnormalities that may have either caused or resulted from this condition.  Once the diagnosis has been made, these underlying, perpetuating biomechanical factors must be addressed.

Functional biomechanical deficits associated with piriformis syndrome may include the following:

  • Tight hip external rotators including pirifromis
  • Tight adductors (groin)
  • Hip abductor weakness
  • Lower lumbar spine dysfunction
  • Sacroiliac joint hypomobility
  • Hyperpronation of the foot and prolonged toe-off

Functional adaptations to these deficits include the following:

  • Ambulation with the thigh in external rotation
  • Functional limb length shortening
  • Shortened stride length

Next post will discuss treatment options for piriformis syndrome

Lateral Demipointe Compressed - Xray of Ankle

POSTERIOR IMPINGEMENT IN DANCERS

Posterior ankle impingement is a common cause of pain in ballet dancers.   Other names for this condition are “os trigonum syndrome” and “nutcracker syndrome”.  It is called “nutcracker syndrome” not because of its common occurrence in ballet at Christmas-time but because of the way the tissue of the ankle is squeezed at the ankle.  The following is a brief overview of this condition and how it relates to dancers.

Posterior impingement of the ankle is often attributable to the presence of an accessory bone growth called an os trigonum or a Stieda process that is located just behind the talus (see x-ray for anatomy).   The stress from repetitive plantarflexion by dancers, especially at a young age, is the suspected cause of the development of the os trigonum.  Pain in posterior impingement occurs when the soft tissue of the ankle is pinched between the posterior lip of the tibia and the calcaneus.  This occurs when the foot is in extreme plantarflexion such as during releve in the demipointe or en pointe positions.

Diagnosis
Ankle pain ballet San Diego

Proper diagnosis of posterior impingement is imperative for recovery from this injury.  Posterior impingement attributable to an os trigonum is usually misdiagnosed as Achilles’ tendonitis/tendonopathy, peroneal tendonitis or flexor hallucis longus strain.

The two main symptoms of posterior impingement are a decrease in plantarflexion compared with the unaffected ankle and pain in the posterior region of the ankle.  Often dancers are aware of a lack of ability to fully pointe in one foot compared to the other, this may be an early sign of impingement.   Another common description dancer’s use is it feels like pinching in the heel during releve.  Diagnosis is often aided by x-Rays of the ankle.  It is best to request an x-ray to be taken during releve to evaluate the biomechanics of the injury.  If there has been persistent pain for a period of 1– 4 months, local swelling, and radiographic assessment indicating a posterior ankle impingement, then an MRI should be performed.

Treatment for Posterior Impingement of the Ankle

Once posterior impingement is diagnosed focused treatment should begin.  Non-surgical care is usually successful and should be the first line treatment.  Treatment should be focused on taking pressure off of the tissue being pinched.  Exercises should focus on engaging the deep muscles of the leg especially the deep flexors.  One exercise that is helpful and can be done at home is a self traction maneuver with plantarflexion (see picture).  The patient holds his or her ankle, as shown, with downward pressure and performs the motion with a bent knee.  Bending the knee helps disengage the gastrocnemius muscle and soleus forcing the deep flexors to engage. Post Impingement Exercise Compressed Another great exercise is ankle range of motion with traction applied by a therapist using very strong elastic bands.  Dancers may experience relief with traction and feel they are able to fully plantarflex; this can also be a good way to support the diagnosis as Achilles’ tendonitis is often unchanged with traction.  Manipulation of the ankle especially the talus can provide relief as well. Conservative therapy is successful in the majority of cases. Recovery may take several months.

A surgical approach should only be adopted in the following cases:

  • recurrent or unremitting symptoms in professional ballet dancers;
  • persistent decreased plantarflexion compared with the unaffected ankle;
  • failure of physical and medical therapies after 1– 4 months (depending on the level of the athlete/dancer);
  • posterior impingement clinically suspected and indicated by both x-ray and MRI.

Ankle pain and heel pain is a common symptom in dancers and posterior impingement is only one of the causes. If you think you may be suffering from posterior impingement seek advice from a qualified healthcare professional with expertise in dance injury.

-Dr. Rose, DC, CCSP®

Dr. Rose is a Certified Chiropractic Sports Practitioner® with experience in dance medicine.  He is currently Director of Physical Rehabilitation at Ballet San Jose and a member of the International Association of Dance Medicine and Science.

REFERENCES

Albisetti W, Ometti M, Pascale V, De Bartolomeo O: Clinical evaluation and treatment of posterior impingement in dancers. Am J Phys Med Rehabil 2009;88:349–354.

Niek van Dijk C: Anterior and posterior ankle impingement. Foot Ankle Clin 2006;11:663– 83

F Cilli, M Akcaoglu: The incidence of accessory bones of the foot and their clinical significance. Acta Orthop Traumatol Turc 2005;39:243– 6