Posts

Outer hip pain running clinic San Diego

Outer Hip Pain in Runners

Outer hip pain is a very common complaint we see with out runners at our Mission Valley office. The outer hip musculature is designed to provide hip, and lower back stabilization during running. When there is pain or tightness at the outer hip, the stability at the hip and lower back is compromised. This in turn can create abnormal stress into the hip, outer hip muscles, lower back, the knee, and even the lower leg/foot. The following conditions cause outer hip pain and dysfunction:

Causes of Outer Hip Pain

  • Glute Medius Muscle Strain
  • Tensor Fascia Latae Strain
  • Gluteus Medius Tendinopathy
  • Trochanteric Bursitis
  • Iliotibial Tract Syndrome (IT Band Syndrome)
  • Sciatic Nerve Entrapment

As mentioned above, the out hip plays a role in lower back and hip stability. If the outer hip is painful or dysfunctional the following conditions may also be present:

  • Low Back Pain
  • Facet Joint (Lower Back Joint) Irritation
  • Hip Impingement
  • Knee Tracking Issues
  • Outer Knee Pain (IT Band Syndrome)
  • Shin Splints
  • Plantar Fasciitis

Evaluation

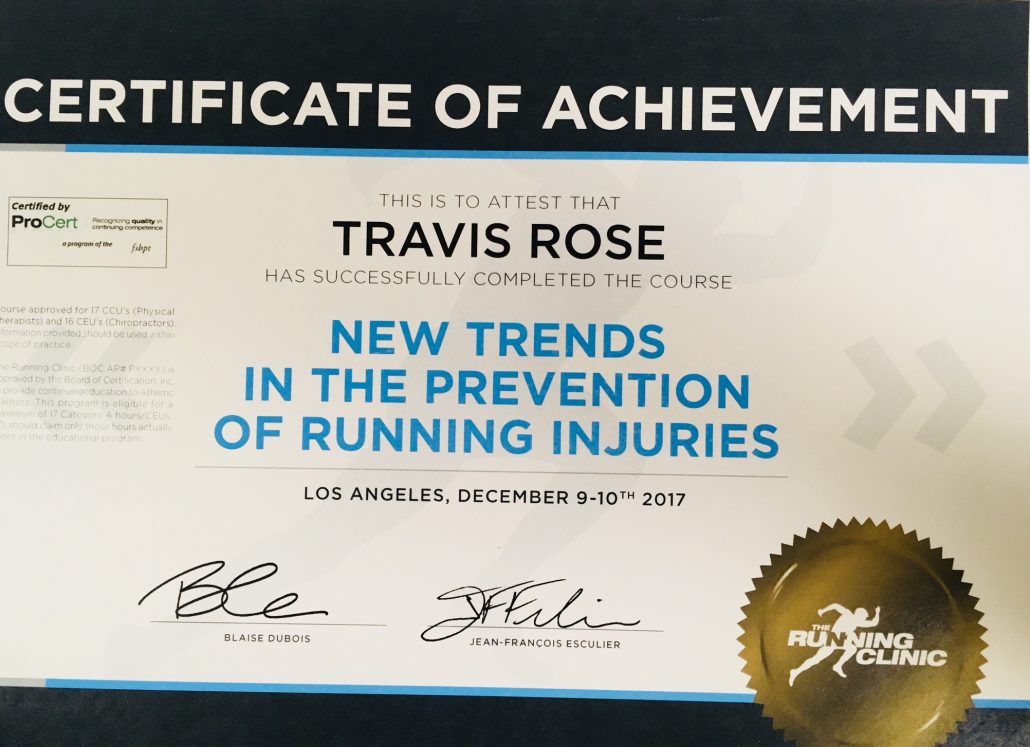
It is important to be evaluated by a running doctor and sports chiropractor. We will help diagnose your outer hip pain and any potential compensatory injuries that may be occurring simultaneously.  A combination of range of motion, orthopedic, functional movements, and strength/endurance tests will be used to pinpoint the exact cause of your pain.

Gait Analysis

We currently offer at home gait analysis for current patients. After being evaluated in our office, if it is deemed necessary, we have our patients video tape themselves running on a treadmill and send it back to us for evaluation. For outer hip pain, many runners with outer hip pain run with what is known as a cross over gait. Check out our previous blog posts here on what a cross-over gait consists of.

Hip pain Running San Diego

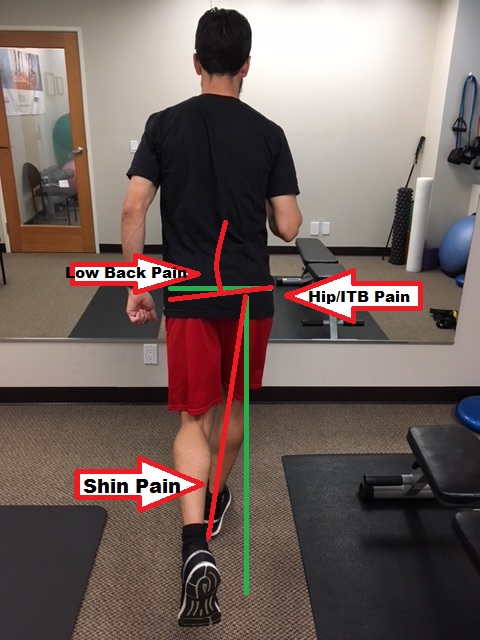
Potential sites for injury with cross over gait

Treatment for Outer Hip Pain

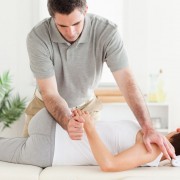
Active Release Technique is an excellent tool for helping runners with outer hip pain get out of pain quickly. A targeted home rehab approach is then prescribed b our running doctor as a way to prevent the injury from coming back again. Schedule with us today at our Mission Valley, San Diego running injury clinic today!

The Running Clinic Certification

Congratulations to Dr. Travis Rose, DC CCSP for successfully completing the course in “New Trends in the Prevention of Running Injuries”! This course, taught by The Running Clinic, teaches health care providers about the latest methods to treat and manage running injuries. Dr. Rose is currently the only healthcare provider with this certification in Mission Valley, San Diego.

Running Clinic Running Doctor San Diego

The following is a quick Q and A with Doctor Rose regarding running injuries.

Q: Having taken this latest course, put on by The Running Clinic, what were the main takeaways to prevent running injuries?

Dr. Rose: The main takeaways for injury prevention and increasing running efficiency were the following: 1. Run with a cadence between 170-180 steps per minute, 2. Limit the up and down motion while running (decrease vertical loading associated with injury), and 3) Use as little of a shoe as possible as this allows you to run more naturally.

Q:  Was there information that surprised you or went against conventional running information?

Dr. Rose: The biggest “eye opener” was the fact that there is zero research to support prescription of specific shoes for specific types of feet. Many people put their trust in companies to tell them which shoe to buy based on treadmill analysis. Unfortunately there is research that shows that shoes don’t limit pronation like they claim to do. So why give somebody a big bulky shoe when it doesn’t do what it is designed to do? Instead, work on the items listed above and become a better runner!

Q: What is the biggest cause of injury in runners?

Dr. Rose: It is when a runner changes something. For example, a runner runs 25 miles per week, same distances for each run. But then decides to run an extra 10 miles one week. That change in volume is what will likely cause an injury to pop up. Another example is always running on concrete or hard trails, then deciding to run 10 miles on soft sand. The body was not ready to support a long soft sand run and an injury occurs.

Q: There is a lot of information for exercises online to help improve running technique, can a runner do home exercises and fix their running flaws?

Dr. Rose: Unfortunately no. I used to be under that assumption when I was an injured runner. I would get frustrated when I would do a ton of strength exercises and core work to then run 2 miles and have that all too familiar pain come back. Running gait needs to be corrected to take strain off the injured area. Using myself as an example, I suffered from repeated shin splints due to cross over gait. It did not matter how much glute or calf strengthening I did because once I ran incorrectly again, the tendon would get overloaded and I would be back to square one. Once I learned to run with a wider step width and have a faster turn over (faster cadence), my injury went away almost immediately and I was able to slowly build back up.

Q: Any other advice on running injuries that you learned?

Dr. Rose: When in doubt, get it checked out. Running should be fun and injury free. I hear too many stories from patients about how tight and sore they are after every run. Or that pain is something “you deal with as a runner”. Not true! Get evaluated by a running doctor who can get your gait back on track. If there is not a running doctor in your area, there are a few pieces of wearable technology that can help. One being Lumo Run which gives feedback on cadence, vertical bounce, hip drop, hip rotation, and braking force. If you already run with a running watch, usually they have features that you can use (like cadence) to start really emphasizing proper technique.

Dr. Travis Rose DC CCSP and Dr. Kevin Rose DC DACBSP are Chiropractors trained to treat a wide variety of sport related injuries. Schedule a visit at our Mission Valley, San Diego office!

San Diego Sports Chiropratic

Benefits of Sports Chiropractic

Sports Chiropractic Mission Valley San Diego

Sports Chiropractic Benefits

In general, chiropractic care is excellent for treating many different muskuloskeletal conditions. Many people also seek sports chiropractic care to recover from sport related injury, improve sport performance and avoid potential re-injury through regular maintenance visits. Unfortunately, not all chiropractors are trained to specifically diagnose and treat sport related injuries. If you are seeking care for a sports injury, it is important to know how to find a chiropractor who specializes in treating sport injuries.

Sports Chiropractic Board CertificationDACBSP Certfified

There are two main sport chiropractic certification courses that chiropractors can take after graduating chiropractic college. Both certifications are governed by the American Chiropractic Board of Sports Physicians (ACBSP). The first certification is a Certified Chiropractic Sports Physician® (CCSP®) which is a 100 hour post graduate program designed to educate chiropractors in the most common sports injuries and best practices to treat them.  Successful completion of the program requires a passing score of 250 question multiple-choice questions. The second certification is a Diplomate American Chiropractic Board Sports Physicians® (DACBSP®) is a continuation of the CCSP® program with an additional 100 hours of field training with a research project, and requires successful completion of both a written and practical examination. A sports chiropractor will have either the CCSP® or DACBSP designation behind their name.

Treatment Types

A sports chiropractor is trained in many manual and passive therapies to help an athlete recover from injury and prevent future injury. Our Sports Chiropractors at our office in Mission Valley offer the following therapies and modalities:

  1. Joint manipulation/mobilization– Restores proper range of motion and function to an injured joint.
  2. Muscle Stimulation– Electricity is transmitted via pads to the muscles surrounding the injured area. This helps loosen muscles, and increase blood flow to the area.
  3. Active Release Technique– Active Release technique is the “gold standard” in soft tissue treatment. It helps break down scar tissue that developed from acute trauma or chronic micro trauma to a structure.
  4. Graston Technique– Graston utilizes a set of stainless steel instruments to break down scar tissue in the muscles and the fascia that surrounds the muscles.
  5. Therapeutic taping– RockTape is used in our office to promote body awareness in a dysfunctional area and to support injured tissues during athletic competition
  6. Therapeutic exercise– Flexibility, mobility, strength, endurance, etc. exercises are given to each patient for specific goals in the treatment.
  7. Training advice– A progressive return of the athlete to their sport is vital for the full recovery from injury.

Sports Chiropractic at Peak Form Health Center Mission Valley

Our sports chiropractors at our Mission Valley office are board certified to treat sport related injuries. We treat athletes of all abilities, from the weekend warrior to the professional athlete. We are also athletes ourselves, and understand the importance of feeling your best for optimal performance. Our office is conveniently located off the Texas Street exit in Mission Valley. Please schedule today to get your training back on track and perform at your highest level!

Sports Chiropractor Ironman

Sports Chiropractic Baseball

Dr. Travis Rose, DC CCSP (Left) is an accomplished Ironman Triathlete. Dr. Rose successfuly completed the Ironman World Championship in Kona Hawaii 2017.

Dr. Kevin Rose, DC DACBSP (Right) is a former professional baseball player. Dr. Rose pitched for the Philadelphia Phillies organization.


5 Ways to Strengthen Weak Ankles and Prevent Ankle Injuries

Prevent Ankle Injuries: 5 Ways to Prevent Ankle Injuries

5 Ways to Prevent Ankle Injuries

Ankle injuries are one of the most common injuries among athletes. While it is impossible to completely prevent ankle injuries, taking precautionary measures before exercising can help limit the risks. Listed below are stretches to help strengthen and loosen up the muscles around the ankles. These exercises are great for both preventing injuries from happening and helping you recover from an existing injury:

  1. Peroneal Stretches

    One of the most important muscles to strengthen during any recovery or prevention of an ankle sprain is the peroneal muscle. These muscles extend from the top of the knee all the way down to where they attach at the bottom of the foot.

    The exercise is easy: Gently roll onto the outside of your feet and walk around for 60 seconds. This helps strengthen your ankle muscles and gives them additional flexibility.

  2. Ankle Circles

    This simple exercise will help strengthen the muscles in and around the ankle, improving the joints stability. You can either sit on a chair or stand for this conditioning.

    Extend your leg straight out, without bending the knee. Rotate your foot clockwise 10 to 20 times, rest leg for 5 seconds, and raise it again to rotate counterclockwise 10 to 20 times. Alternate legs and do 3 or 4 sets per side.

  3. Dorsiflexion Stretches

    The Dorsiflexion stretch is crucial amongst runners. This stretch is responsible for strengthening the muscles that run along the shin of the leg, called the Anterior Tibialis. This muscle is what controls the up and down movements of the toes. Therefore, strengthening this muscle will not only help prevent shin splints, but can also help protect the muscles and tendons in the ankle.

    First, sit on the floor with your right leg straight out and the left leg crossed, with the sole of your left foot resting against the inside of your right leg. Place a towel or band around the ball of the right foot and gently pull your toes back toward you. Hold for 15 seconds, repeat the stretch 4 times, and then switch legs.

  4. Write the Alphabet

    This exercise is as easy as reciting the alphabet! All you are doing is tracing every letter of the alphabet with your big toe. This exercise is best if you are seated in a chair.

    Hold your right leg straight out in front. Using your big toe as the “pen”, first write each letter of the alphabet in all capital letters. The same process again with lower case letters, then switch feet and repeat. Writing the alphabet is a challenging exercise that will help strengthen both of your ankles!

  5. Achilles Stretches

    Rupturing the Achilles tendon can set you back for quite a while. By doing regular Achilles stretches, you can help limit the risk of rupturing the tendon and help improve flexibility.

    From a standing position, bend the knee of your left leg at a 45 degree angle. Step the right leg back and keep it straight. Ground the heel of your right foot and push the hips forward. Hold this position for 15 to 30 seconds and then switch legs, repeating 2 to 4 sets on each leg.

Athletes at Risk

At our Mission Valley Office, we see many athletes with injured ankles including: ballet dancers, MMA fighters, soccer players, baseball players, and foot ball players. It is important to perform the above mentioned exercises to help prevent ankle injuries. If you are currently experiencing an injury to the ankle, please schedule with our certified sports chiropractors today!

strength training tips mission valley

Strength Training Tips

Strength training is an important part of an overall fitness program. Traditionally, it’s been encouraged to participate in aerobic activities such as swimming and bicycling, however, strength training can also be safe and effective for youth and adults, provided that appropriate guidelines are followed. Strength training is a method of conditioning that involves a wide range of equipment and activities, with dumbbells, medicine balls, weight machines, and body weight exercises that are specifically intended to improve or maintain muscular fitness. Furthermore, a routine strength training program can reduce the risk of sports-related injuries in athletes. Despite its reputation as a “guy” thing, strength training is an important part of overall health and fitness for everyone of any gender or age.

Strength training helps develop strong bones by increasing bone density and reducing the risk of osteoporosis. It can help control your weight as well, because as you gain muscle, your body starts to burn calories more efficiently. Strength training also aids in boosting your stamina and sharpening your focus. It can also help reduce the symptoms of chronic conditions, like arthritis, back pain, obesity and many other ailments.

Although every combination is different depending on your desired results, a safe and effective strength training program should follow these important guidelines:

  • A warm up and cool down of about 5 -10 minutes is ideal. Walking is an excellent way to warm up and stretching is an good way to cool down.
  • Remember to focus on form, not weight. Use correct body alignment and smooth movements through each exercise. Poor form can increase injuries. Also, when learning a strength training routine, many professionals advise starting with no weight, or very minimal weight. Try to concentrate on gradual, smooth lifts.
  • Keeping a consistent, moderate tempo helps you stay in control. For instance, you can count to three while lowering a weight, then hold, then count to three while raising it back to the starting position.
  • Pay close attention to your breathing during workouts. It’s best to exhale as you work against resistance (whether by lifting, pushing, or pulling) and inhale as you release resistance.
  • By slowly increasing weight or resistance used, you can keep challenging your muscles. The appropriate weight you should use differs depending on the exercise. Choose a weight that wears out the targeted muscle or muscles by your final two repetitions, but still allows you to keep good form. If you choose to add weight, remember that you should be able to continue to do all the repetitions with proper form and the targeted muscles should feel drained by the last two.
  • Stick with your routine. Working all the major muscles of your body two or three times a week is best.
  • Keep in mind, it’s good practice to give your muscles some time off. Always give your muscles at least 48 hours to recover before your next strength training session.

Participation in routine strength training has the potential to offer great value to the overall health and fitness of athletes and those participating at any age, provided age-appropriate training guidelines are followed.

whiplash san diego

Chiropractic and Whiplash – San Diego

Whiplash is the medical name for an injury to the neck that is created from a sudden jolt from front to back that creates a whip style movement. Whiplash is more often sustained in motor vehicle accidents; however, it can occur from a fall or sports/work related injury and so forth. The Whiplash injuries are normally due to the result of a sprain-strain to the neck, where the ligaments which provide support, protection and also limit the movement of the vertebrae are damaged. The most commonly injured joints are the facet joints which are located in the back portion of the spine. However, these are usually not the only injuries.

With more severe whiplash injuries tendons and muscles are strained and stretched, vertebral discs can be bulge or herniate, and the nerves may also suffer stretching and become irritated and inflamed. The most common symptoms that are felt with whiplash are stiffness and pain through the neck, generally found in the areas that have sustained damage. Most commonly pain will be in the front and back of the neck and turning the head will make the pain more severe. A headache is also a normal symptom of whiplash. Pain can also be found to extend through the upper part of the body.

In addition to the joint pain, some people experience dizziness, sickness, and even visual problems following a whiplash injury. These symptoms must not be ignored, and medical intervention should be sought if they do not resolve in a day or two. Whiplash symptoms are not always immediate and can take up to two days to appear.

Those suffering from whiplash need to stay active unless they have sustained an injury that requires immobilization. They may be worried but should move as much as possible. The doctor will more than likely prescribe some form of stretching exercises. These exercises are very important to aid recovery.

It is normal to use ice or heat to control the pain and reduce swelling after a whiplash injury. The injured party may also have electrical stimulation or ultrasound if necessary for short term relief. In the case of neck pain, spinal manipulation or spinal mobilization from a chiropractor can provide additional relief.

Debunked Workstation Myths

Debunked Workstation Myths

There are many commonly accepted guidelines for a safe and comfortable workstation that are actually myths. Some postures and furniture can actually harm you and lead to discomfort, if rigidly followed. These debunked workstation myths will help you to manage the health risks of your home or work office:


Debunked Workstation Myths


Myth #1: Sitting correctly at a desk will eliminate discomfort and reduce injuries.

Debunked Workstation Myths
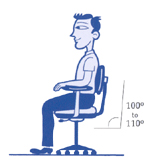
In actuality, sitting with picture-perfect posture for long periods of time can actually lead to more discomfort, as it is extremely fatiguing. It can also lead to joint-pain and muscle strain because the torso is placing constant pressure on the lower disks in your back. Even in the ergonomically correct position, your arms and hands can still incur injuries. Any time you are sitting or standing in a static position, you increase the risk of prolonged physical conditions. To avoid any injuries at your workstation, try alternating between sitting and standing while working. Choose dynamic positions that will increase blood flow and alleviate stiff muscles. Also, include small rest breaks and stretch frequently to help avoid injuries.


Myth #2: Always sit upright, and never recline at the workstation.

4 out of 5 workers would prefer to recline their chair slightly when working. In fact, a reclined position creates much less fatigue than sitting upright. Being slightly reclined is also much easier to maintain and alleviates gravitational pressure on the lower disks in the back. However, be cautious to avoid slouching, which can cause injuries from a lack of sufficient back support.


Myth #3: Ergonomic chairs are one-size fits all.

A single chair size won’t fit every shape and size. Women are shaped differently than men, and their hips are generally wider. Men usually have longer legs and consequently will need a deeper seat. There are many different body types, and each one requires a different seating solution. In addition, different chairs are appropriate for different tasks. When selecting an ergonomic chair, consider the tasks you will be doing and your body size and shape.


Myth #4: Adjust the chair height according to the table height.

Unfortunately, this is not always the case. Although it may seem like a simple solution, this does not always result in a safe sitting position. Instead, keep your chair at the appropriately adjusted position for your body type. If your chair is too low, it can add extra pressure to your legs and back. If the chair is set too high, it can result in discomfort from your feet dangling. You can get a footrest to avoid this, but the best way to avoid injuries is to adjust the table height or the task at hand.

Many people don’t realize that these commonly believed workstation postures are in fact myths. By educating yourself with the above recommendations, you can avoid unnecessary workstation injuries and added discomfort.

Ergonomic Chair Setup

Comfortable desk work begins with proper chair setup. Follow these helpful tips to ensure a proper ergonomic chair setup.

Chair Setup

  • Push your hips as far back as they can go in the chair.
  • Adjust the seat height so your feet are flat on the floor and your knees are equal to, or slightly lower than, your hips.
  • Sometimes the desk height forces you to have the chair higher than you what will allow you to touch the ground.  If your feet don’t reach the ground put a small box under your desk to rest your feet on.
  • The back of the chair should be at a 100°-110° reclined angle which should create an angle between your body and your thighs of 90° -100°.

    Step 1 Chair.

    From UCLA Ergonomics

  • Make sure your upper and lower back are supported. Use extra cushions at the small of your back if your chair does not have adequate support.
  • Adjust the armrests so that your shoulders are down and relaxed.
  • If your armrests prevent your shoulders from being in a relaxed position, remove them.
  • Keep your body straight with the head and neck upright and looking forward, not to the side. Do not hunch over or slouch.

OTHER TIPS

  • Don’t cross your legs while sitting. This can cut off circulation and/or lead to hip problems.
  • Make sure your chair seat has a soft, downward curved edge so that it does not dig into the back of your thighs. This can also cut off circulation.
  • When purchasing a chair the best feature is its ability to adjust each component separately.
  • If sitting is too painful, consider a standing workstation.


Next post “Ergonomic Keyboard and Mouse Setup”

Best Chiropractor in Mission Valley


Congratulations to Dr. Rose, DC on being voted 2012 Best Chiropractor in Mission Valley by Mission Valley News.

Click Here for the entire release.

Mission Valley News offers community news and information on Mission Valley, Old Town, Linda Vista and surrounding areas.

Sciatic Nerve Glide

Piriformis Syndrome Part III- Treatment

Piriformis Syndrome Treatment

The two main goals of treatment are 1) to relief irritation to the sciatic nerve and 2) address any functional problems that may be contributing.
If the sciatic nerve is inflamed the first step is to decrease aggravation from compression. Things to avoid are leg crossing, sitting on your wallet, and sitting on hard surfaces.  Things you should begin doing are applying ice to the piriformis, stretching of the piriformi, and taking oral anti-inflammatories (as directed).  Stretching every 2-3 hours (while awake) is a key to the success of non-operative treatment. Prolonged stretching of the piriformis muscle is accomplished in while lying on your back with the hip flexed and passively adducted/internally rotated (see picture).  Another exercise that can be helpful to decrease irritation between the piriformis and sciatic nerve is a nerve gliding exercise.  This exercise tensions the sciatic nerve and allows it to move relative to the piriformis. It is sometimes called nerve flossing to better describe how the nerve moves through other structures.  Two types of nerve gliding exercises are pictured below. (Pictures from http://www.dynamicchiropractic.com/mpacms/dc/article.php?id=53203)
 Sciatic Nerve GlideSciatic Nerve Tensioner
Manual therapy can be extremely helpful in releasing tension on the sciatic nerve and addressing functional deficits.  Soft tissue therapies, including myofascial release and Graston®, aimed at releasing tension and muscular adhesions within the piriformis can be beneficial.  Chiropractic spinal adjustments can help address functional contributions from the spine such as sacroiliac joint hypomobility and low back dysfunction.  Hyperpronation of the foot can be addressed through orthotics in the short term and foot strengthening in the long term.  Pronation is a normal foot motion however overpronation may lead to increased external rotation of the hip with walking putting tension on the piriformis and sciatic nerve.
Treatment may take several months of consistent work and it is important not to get discouraged. As long as there is no progression of neurological symptoms conservative treatment is the best option. Your symptoms should be monitored by a healthcare practitioner to ensure there is no progression.
-Dr. Kevin Rose, DC