Sports injuries are injuries that occur in athletic activities. They can result from acute trauma, or from overuse of a particular body part

What is Chiropractic Care?

What is Chiropractic Care?

Chiropractors are trained to evaluate, diagnose and treat neuromuscular and musckuloskeletal conditions. It is a common misconception that chiropractors only treat spinal conditions with spinal manipulative therapy, or adjusting techniques. In fact, chiropractors treat a wide array of muskuloskeletal conditions which include neck pain, back pain, and headaches but also tendon disorders, muscle strains, and ligament sprains which commonly affect our upper/lower extremities. In our Mission Valley, San Diego office, we commonly treat soft tissue injuries with a combination of joint manipulation, Active Release Technique, Graston Technique, and rehabilitative exercise.

What to Expect for your First Visit?

History

There are a few forms to be filled out that answer questions regarding your current injury (or reason seeking care) and past health issues. One of our chiropractors will then go over this information with you and ask a series of questions regarding your current and past injuries; this helps give us information that leads to a working diagnosis.

Exam

Pain Fighting Exercises

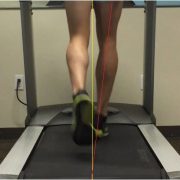
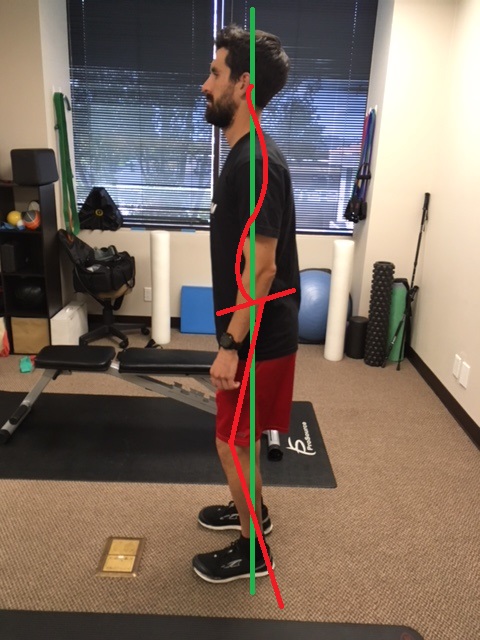
After the history is complete, a physical exam is performed. This normally includes: active/passive range of motion, orthopedic testing, neurological testing, and functional tests such as squats/lunges. All these tests give us further information to accurately diagnose the condition that you are presenting with. This in turn will develop an appropriate treatment plan moving forward. In some cases, the history and exam may reveal a condition that is in need of further testing (X-ray, MRI) before treatment can begin. In rare cases, a referral to a specialized health care provider is warranted.

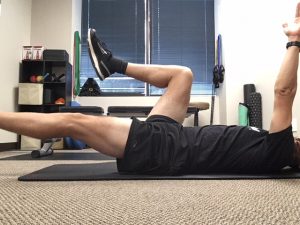
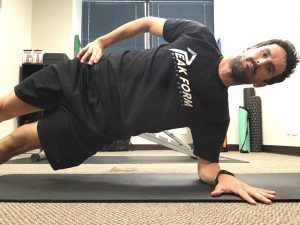
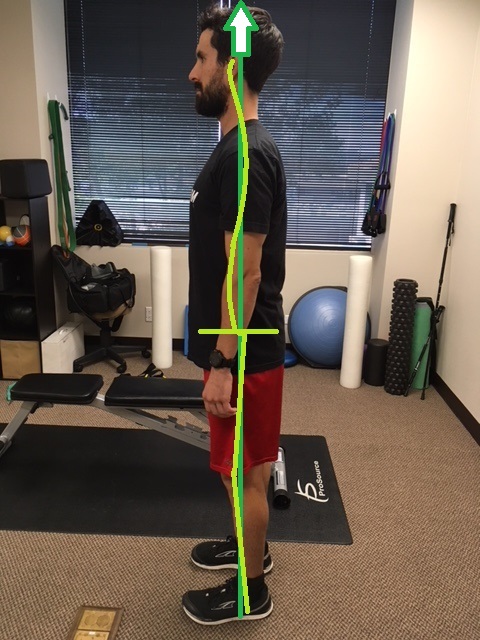
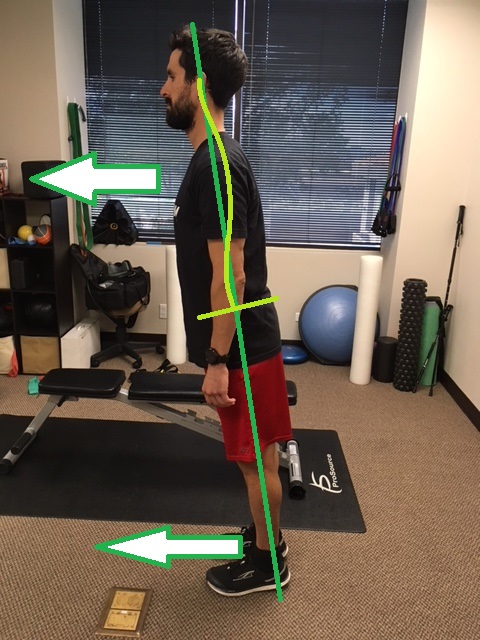
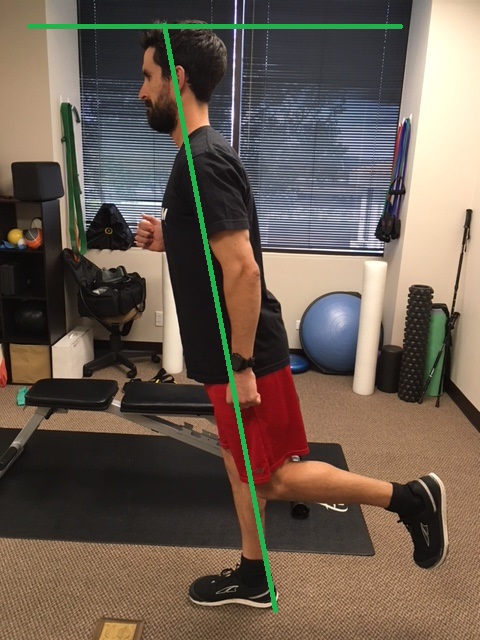
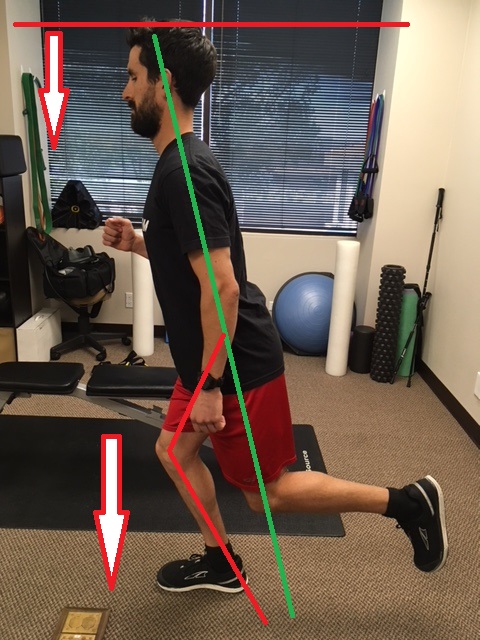
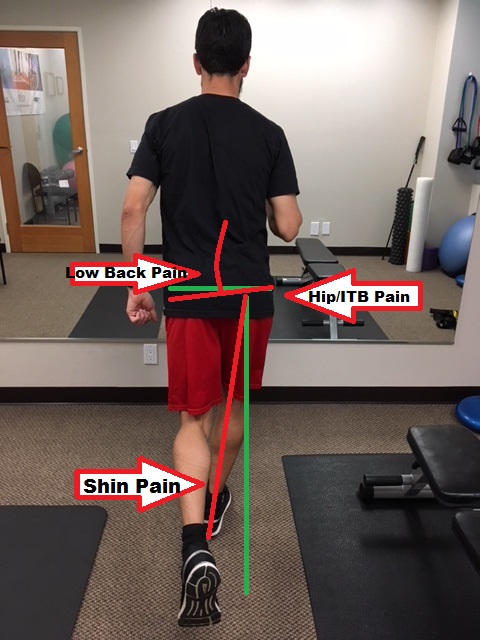
Many of our patients at our Mission Valley office seek out our care for sport performance and are not currently injured. In these cases, we focus on evaluating musculoskeletal imbalances that may be limiting sport performance.

Treatment

As mentioned above we utilize the latest therapies and treatment protocols for each injury we see in our office. Treatment may include some or all of the following:

                                          Active Release Technique Mission Valley

  1. Joint manipulation/mobilization- If it is determined that there is loss in range of motion at a joint, joint manipulation or mobilization can be performed to restore proper range of motion and joint function   
  2. Active Release Technique– Active Release Technique or (A.R.T) is considered the “Gold Standard” for treating soft tissue injury. The practitioner identifies the injured structure, applies pressure, and has the patient perform active movements. This helps break down scar tissue and restore proper function to the soft tissue. Treatments usually last 5-15 minutes and can be painful in areas where the injury is.
  3. Graston Technique– Graston is another technique we use in our Mission Valley office that helps break down scar tissue in the superficial layers of muscle and fascia in our body. Graston is also excellent for treating chronic injuries due to its ability to increase blood flow to the injured area. After treatment, you may notice red marks and feel warm in the area due to this increase in blood flow.
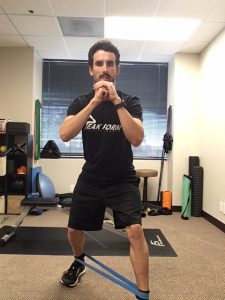
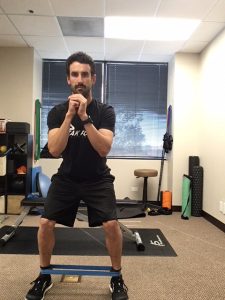
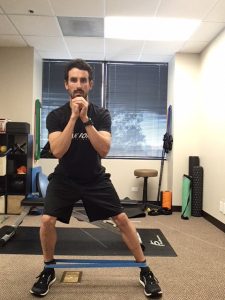
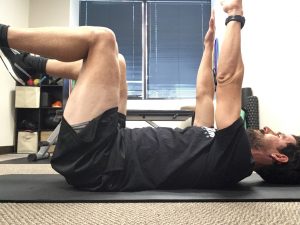
  4. Rehabilitative Exercise– An individual exercise plan is prescribed for each patient. Exercises may include flexibility, mobility, strength, stability, etc.depending on your injury and or goals with care. Our goal is to always keep the exercises progressive to avoid plateaus in care.

 graston technique in san diego Active Release Technique Mission Valley


Our goal is return patients to their sport, activity, job as quickly as possible, pain free. We often see significant results between 4-8 visits, depending on the severity of the condition. Once a patient has reached maximal improvement for the condition we recommend periodic check ups to re-evaluate the area. This allows us the opportunity to offer further advice, change exercises, etc. to avoid future re-injury. 

Please do not hesitate to contact our Mission Valley office at 619-818-4306 if you have any questions. You may call our office or visit our website to schedule today! We accept most major insurances, offer affordable cash rates, and offer a military discount for treatments.

Walking Hip Hike for Running

Walking Hip Hike for Running

Running is essentially a one legged sport when you break it down. One leg touches the ground, supports the body moving forward, and then lifts as the second leg touches down. The walking hip hike drill shown below is great for the following: activate glute stabilizing muscles, improve single leg balance, develop hip/low back control with movement. This is great as a accessory drill for running in general and really good to work on if you suffer from a cross-over gait. Find more information on cross-over gait on our blog: Do you run with a Cross-Over Gait? and Cross over gait Correction.

I recommend performing this drill as a warm up exercise before running. This will activate the stabilizing glute muscles to help build awareness to those muscles during the run. Start by performing 10 steps on each leg before the start of each run. If you are a new runner or trying to fix a cross-over gait, perform this drill daily, with and without runs to develop a stronger mind body connection to those muscle groups.  If you find this drill to be too challenging, try performing other glute activation drill such as a bridge, clam shell, and side lying leg raise.


Weakness to these muscle groups can lead to a number of musculoskeletal issues. Injuries may include low back pain, hip bursitis, IT band syndrome, and shin splints. The hip hike walk will help decrease your chance for developing these injuries or will stop these injuries from reoccurring. Are you already injured? Please schedule with us today to get your running program back on track. We offer the latest treatment methods including: Active Release Technique, Graston technique, Sports Chiropractic, and are certified by The Running Clinic to treat runners and running related injuries!

IT band syndrome exercises san diego

Cross-Over Gait Correction

Some of the links in this post are affiliate links. We may earn an affiliate commission if you click on a link and purchase an item we recommend. This doesn’t add any additional cost to you, but helps support our business.

How to Fix a Cross-Over Gait

The best way to work on crossover gait is to perform running drills! Many runners are simply unaware that they run with a cross-over gait. Specific running drills to address a this type of gait will significantly improve running efficiency and decrease risk for injury. At our Mission Valley sports injury clinic, we stress the importance of running drills to all of our running patients.

There are three main drills that significantly reduce cross-over gait: increasing cadence, running wider, and activating the hip stabilizers while moving through gait.

  1. Cadence– I talk extensively about cadence in our blog post here. In a nutshell, by increasing running cadence, there is less time for your feet to travel across midline.  Slow cadence allows more time for your feet to creep over midline.
  2. Run wide using a track line– Run around a track with lane lines (or white bicycle lane line). Run so the line is in the middle of your body. The goal is to land with the inner right foot touching the right outer border of the line and vice versa for the left foot. It may feel like you are running VERY wide but with practice it will feel more normal. Practice this drill on the straight away on the track about 4-6 times. Over time you will start to run wider naturally.
  3. Walking hip hikers– The goal is to activate the gluteal muscles, and hold while taking a step. This builds the mind body connection to the hip/core muscles while moving during gait. Watch the video below for a detailed look at the walking hip hiker.

What About Increasing Core Strength?

Core and gluteal strengthening drills alone will not magically get rid of a cross-over gait; again working on correcting the gait will do that. That being said, working on the core and gluteal muscles in conjunction with gait retraining, will support proper running gait. The stronger the supporting muscles are, the more capable they are to resist fatigue during workouts and races. Some runners have no issues with their gait for runs between 3 and 10 miles. Once long runs increase to the 12, 14, 16 mile range, gait issues begin to occur. In this scenario, strengthening workouts to the core and gluteal muscles are paramount to avoid running form breakdown during longer runs. Here are a few of our favorite core and gluteal strengthening exercises:

Gluteal bridge

Lay flat on your back, knees bent, and feet flat on the floor just wider than hip width apart. Brace your abdomen to engage the core. Press through your heels to lift the pelvis upward until it is in line with the knees and shoulders. Avoid arching through the back. Add a band around the knees for more gluteal activation. Sets: 3 Reps: 10-20

Bridges improve core and gluteal muscle strength, important for running               Bridges improve core and gluteal muscle strength, important for running

Monster walking 

Place a medium resistance mini-loop band around the ankles. Spread feet shoulder width apart and sit into a shallow squat, keeping your core engaged. Step forward and slightly outward with one foot and then repeat with the other. Take 5-10 steps forward and 5-10 steps backward. Continue until you feel a good exercises burn in the muscles of the outer hip. Sets: 3 Reps: Go until it burns

Walking with a band strengthens the gluteus medius muscle to improve hip and low back stability               Walking with a band strengthens the gluteus medius muscle to improve hip and low back stability

Crab walking     

Place a medium resistance mini-loop band around the ankles. Spread feet shoulder width apart and sit into a shallow squat, keeping your core engaged. Take a step to the side, then take the same distance step with the other foot in the same direction; important to not over step inward with the follow up step as this looses tension in the band. Take 5-10 steps one direction and 5-10 steps back in the other direction. Continue until you feel a good exercises burn in the muscles of the outer hip. Sets: 3 Reps: Go until it burns

Walking with a band strengthens the gluteus medius muscle to improve hip and low back stability               Walking with a band strengthens the gluteus medius muscle to improve hip and low back stability

Dead bug

Lay on your back, with your knees and hips bent to 90 degrees and arms held straight in front of shoulder. Brace your core by squeezing back and abdominal muscles. Slowly lower one leg towards the ground, resisting the back from arching up off the ground. Alternate legs keeping a slow pace the entire time. If this version of the dead bug is too difficult, keep the knee bent when moving the leg and perform heel taps. Sets: 3 Reps: 10 per leg

Dead bug improves lumbo-pelvic muscle control important for running               Dead bug improves lumbo-pelvic muscle control important for running

Side plank

Begin by laying on your side with the elbow tucked underneath the shoulder and feel sacked. Keep the body as straight as possible and lift the pelvis off the ground. Focus on contracting the muscles on the side closest to the floor. Perform the side plank on both sides. Sets: 3 Reps: 1 Hold: 30-60 seconds

Side plank improves lateral core stability which is important for running

Self Myofascial Release to the Gluteal muscles

Take a look at the video below. By using a lacrosse/massage ball into the muscles, muscle tension will decrease which can help with soreness, pain, tightness in the area.

These strategies help with correcting a cross-over gait. If you are experiencing shin, knee, hip, back, or foot pain from running, I highly recommend getting the injury evaluated. A targeted approach to your specific injury can prevent time lost to injury. At our Mission Valley office, we perform Active Release Technique, Graston technique, and rehabilitative exercise to keep our endurance athletes competing pain free!

Do you Run with a Cross-Over Gait?

Do you Run with a Cross-Over Gait?

A cross-over gait, also known as a “tightrope” gait, involves running with your feet crossing the midline of your body. As each foot crosses midline, it appears as if you a running along a tightrope. This running style decreases running efficiency and may set you up for future injury (or prolong your current injury!). The areas commonly injured are the inner shin/tendons, knee, outer hip/IT band, and lower back. Beginner runners, and runners with weak core/gluteal muscles tend to run with this type of gait. 

Do you run with a cross-over gait?

The absolute easiest way to diagnose a cross-over gait is by having a gait analysis performed. A professional gait analysis is recommended but a quick video recorded by a friend can be show if the feet cross midline. Setting up a camera behind a treadmill while running solo is another easy way check for cross-over gait (see runner below).  As you watch the stride, look for where the foot lands in relation to the body’s midline.

Other signs of a cross-over gait include: excessive wear on the outside bottom of shoes, scuff marks on the inner legs ( you actually hit yourself with your foot from running too narrow!), side to side head bob noticed visually when looking straight ahead, and inline foot prints when running on sand or dirt. The main symptom of a cross-over gait is recurring injury to the same area with running. Symptoms tend to lessen with treatment and rest but return with increased running volume, intensity, or both. 

 Why is a cross-over gait less efficient?

Simply put, you are wasting energy moving side to side; the more energy spent moving side to side, less energy spent moving forward. Cross-over gait puts a lot more demand on tissues which will cause the muscles of the core, hip, lower leg to work extra hard. The demand will create more fatigue which in turn will decrease efficiency further. 

How does a cross-over gait cause injury?

With a cross-over gait, the foot strikes at or across midline , forcing our joints to work in a non-stacked position. The lower extremity performs best with a stacked orientation to absorb shock/strain with muscles. With the joints working at a slight angle, several tissues now have to work harder to absorb shock and slow down joint movement. The following injuries are commonly associated with a cross over gait:

  1. Posterior shin splints/Posterior Tibialis tendinopathy– While running with a cross-over gait, the foot lands excessively on the outside part of the foot and as the body weight shifts forward, the foot quickly flattens. The slapping down of the foot is often viewed as “over pronation” when in reality, the foot and ankle are pronating too quickly. The posterior tibialis muscle (and other lower leg muscles) must contract powerfully to slow this motion down. This causes excessive strain of the muscle causing shin and tendon pain. Over pronation is not the issue and is a reason why changing footwear in these cases is not helpful. 
  2. Knee pain– As the leg moves toward middle, the inner knee structures get over stretched. The kneecap likes to move in a straight line over the knee. If the muscles are contracting around an angled joint, abnormal tracking of the knee cap occurs.  Patients often have pain at the front part of their knee. If chronic irritation occurs, it can cause swelling around the knee/knee cap.
  3. Outer hip/IT band pain– Again as the leg moves inward, the outer hip elongates, allowing the pelvis to “drop”. This over stretches the outer gluteal muscles. As the hip muscles become more strained, the less stability they are able to provide. Trochanteric bursitis, iliotibial band syndrome are two common conditions that arise from overused/weakened hip muscles. 
  4. Lower back pain– Keeping in mind with what occurs at the hip, the low back joints and muscles get stretched abnormally as the pelvis “drops” due to weak gluteal muscle stabilization. Local low back pain is common from this constant side to side joint irritation. Symptoms may be significantly worse if a runner  has disc degeneration and/or low back joint degeneration.
Cross-over gait injuries

Potential sites for injury with cross over gait

A runner with a cross over gait and a cadence of 180 steps per minute, will cross over 5,400 times during a 30 minute run! Running with a cross-over gait will only worsen as fatigue sets in, setting runners up for injury. It is important to identify this running pattern and address the deficiencies to avoid injury. If you have chronic injuries or recurrent injuries to the same body part, you may be running with a cross-over gait. In our upcoming blog posts, we will be discussing ways to fix a cross over gait and run more efficiently.  

If you are interested in being evaluated for running injuries, our office is conveniently located in Mission Valley, San Diego!

San Diego Marathon Running

Improve Running Posture

Improve Running Posture

Running posture is essentially how you hold your body while running…simple! When looking at the running posture of elite runners, there are quite a few similarities: they run tall, have a subtle forward lean while they are running, limit their up/down movement, and limit their side to side movement. Let’s take a look at each of these individually. *This post will focus on endurance running as the mechanics/posture change with other running events.*

Running Posture Marathon Running

Run Tall

Let’s do a quick test…Stand up and relax your body, looking straight forward. Now, while looking straight forward, think about stretching through your body to each your head towards the ceiling. Another way to think of it is a rope is attached to your head and is pulling your body towards the ceiling. You should feel “taller” and more engaged with your muscles around your spine. This helps activate the spine stabilizing muscles to maintain proper posture: head over shoulders, shoulders over hips, hips over feet.

This spinal stiffness will help us run more efficient and help manage forces traveling through our muscles and joints much easier. In which picture does the runner appear ready to run?


Subtle Lean

Quick test number 2! Stand tall as described above. Now practice moving slightly forward and slightly backward through your ankles; the rest of your body is nice and straight. Good! Now slowly lean forward until you must move one of your legs to “catch” yourself from falling. Practice that a few times. The point where you need to move your leg is roughly where you want to hold yourself while running. This forward lean from the ankles, shifts your center of gravity ever so slightly forward to maintain momentum once you begin running. The faster you run, the more forward lean there is. ********Caution******** Avoid leaning from the waist! When reading about forward lean, runners think “Yea! Lean forward and get my momentum going!”. Leaning from the waist can potentially cause injury particularly at the back, and knees. Don’t do it!

Limit Up and Down Movement

When you think about it, running is a one legged sport; one foot touches the ground, then after a quick transition period of being fully in the air, the other foot touches the ground. This happens very quickly, step after step to keep the body moving forward. What is commonly seen as a runner runs by is a noticeable up and down bounce with their body; this IS a normal movement to an extent but causes issues when it is too great. Two main things frequently occur with beginner and intermediate runners when there is too much up and down movement: 1. There is too long of contact with the foot and the ground allowing the body to “sink” towards the ground due to increased bending at the hip, knee, and ankle, 2. A forceful push off from the toes pushes the body upward and forward.

Ever have extremely sore quads or calves (or both!) following a race? Soreness that lasts days? I have! Why are the legs so sore? When the leg is in contact with the ground for a longer time, the ankle, knee, and hip bend more while the muscles are contracting. This produces eccentric loading to the muscles (muscles lengthen while contracting) which causes the greatest amount of muscle damage. When does this occur? Late in races when our posture deteriorates, and our cadence slows down. Then we try to keep the pace up and muscle through the rest of the run with a slow cadence, resulting in a more forceful push off with our toes… now our calves hurt! Proper posture and a high cadence will help avoid this sequence from occurring or significantly limit the effects.


Limit Side to Side Movement

When running forward, we want our foot to land closer to our body, and under our hips. Similar to above, if there is too much contact time due to a slow cadence, the hip of the swing leg will drop. Now with the hip dropped down, the leg swings forward more towards mid line and then the foot lands, it is now mid line or has crossed over mid line, referred to as a “cross-over running gait” or “tight rope running”. This is the runner you see bounding side to side down the boardwalk. Do you do it? Ever hit your lower leg with your shoe, or see scuff marks on your calf after you run? Those are signs of hip drop; it changes the angle for your leg to move through and literally hits your stance leg. Read more about cross-over gait at our blog here.

Too much side to side movement will decrease your efficiency and set you up for potential injury. If your leg is crossing mid line, the inner muscles/tendons/foot are strained more; recurring posterior shin splints is a common ailment with this gait. There should be a small space between where your feet contact the ground. A strong runner may hide this for shorter runs but as fatigue sets in for longer runs, this will become more and more noticeable. Strength training, running more frequently, and specific drills will help avoid this.


Still with me? That wraps up running posture. Performing the following drills can help improve your running posture and prevent it from breaking down during long runs and races. Schedule with us at Peak Form Health Center to tailor specific exercises to your needs! We are conveniently located in Mission Valley, San Diego!

Tech

Lumo Run- At our Mission Valley office, we encourage our patients to purchase Lumo Run by Lumo tech. It is a wearable device that gives instant feedback (and post run feedback) on many running variables including all the posture points discussed above. Go to the lumobodytech website using this link Lumorun for $10 off! Check out our blog late April 2018 for a full Lumo Run review!

Drills

Posture and Lean

Walk with a Purpose– Stand tall as described above. With each step, push your leg back by squeezing your butt muscles. Continue reaching your head towards the ceiling while doing so. Most of the movement should come from the hip, not the lower back or by pushing off from the foot. Start by working on this before runs 1 minute at a time, but eventually incorporate into your normal walking!

Subtle lean– Stand tall. Rock back and forth from your ankles. 10 forward to help build awareness to where you should be leaning from.

Lean and step– Stand tall. Slowly lean forward until you have to take a step to “catch” yourself from falling forward. Helps work on maintaining a forward lean and proper timing of the first step. 10 steps each leg, three times through.

Band around waist- Anchor an elastic band around a fence, pole, tree, etc. and then place the band around the front of your hips. Walk until you feel the band start gently pulling you back. Now stand tall, keep your body inline and lean forward through your ankles against the band resistance. Move forward and backward to get a feel for a proper lean. Also, once you are leaning into the band, hold that position while taking slow steps in place.

Excessive Bounce

Up and down visualization– Run on a treadmill. Think about a water line right below your mouth; you have to stand tall to and avoid bouncing to avoid falling below that line or else you will be breathing in water. Alternatively, There is a low ceiling right above your head. You must keep your head still or else you will bang your head (Personally do not like this one as much because it does not reinforce elongating your spine/standing tall.)

Cadence– See our blog on cadence here. There are drills in detail there. The purpose is to increase cadence to decrease the amount of time your foot is on the ground so it does not “sink” down resulting in excessive up and down motion.

Cross over gait

Track line– Run around a track with lane lines (bicycle lane line on the road or other lines with similar width work). Run so the line is right in the middle of your body. Your INNER right foot should hit the right border of the line; your INNER left foot should hit the left border. This will force you to run with a wider stance to avoid side to side movement. Occasionally look down to see where your feet are or run with a partner running behind you to give you feedback.

Increase your Cadence!

Increase Your Cadence!

Increasing running cadence will help reduce your risk for injury, and make you a more efficient runner (potentially faster runner as well)! Now that you know the benefit of increasing cadence, let’s go back and look and some of the main points that go into tweaking this aspect of running.

Break the Injury Cycle

Annually, 37%-52% of runners experience a running injury. That is VERY high injury rate! Many of the injured runners I treat are new to running, want to manage the symptoms before their upcoming race, and then stop running afterward because of the nagging symptoms they are experiencing. The following year, the same cycle occurs: signed up for another half marathon, developed an injury, barely made it through the race, and then stopped running due to the nagging symptoms. Stop it! Make changes to why you are injured and then you will no longer have to worry about dealing with nagging injuries. The BIGGEST change you can make is improving your turn over or in other words, increasing running cadence.

What is Cadence?

Running cadence is the number of times your feet come in contact with the ground, measured in steps per minute (every time either foot touches the ground) or strides per minute (every time the same foot touches the ground). The goal cadence is 170-190 steps per minute or 85-95 strides per minute.

This moment was late in a Half Ironman run, my cadence dropped to 170 (normally run comfortably in mid 180s) and began running with more of a heel strike pattern; you can see the lead leg out in front of the body which will increase shock to the body.

How does this help decrease risk for injury?

Increasing running cadence to 170-190 steps per minute, decreases the vertical loading rate during the gait cycle. Basically, you run with less bounce and less impact to your legs reducing the amount of force traveling through the body. Running with a slower cadence (< 170) allows your foot to travel further away from the body before initial contact, and results in more of a “braking” force once contact is initiated (see photo). Your muscles, tendons, ligaments, and joints absorb that extra shock and remain under load longer due to the foot being further away from the body.  Increased load + increased time under load = increased strain to muscles, tendons, ligaments and joints which will eventually lead to failure once enough strain has accumulated. Main take away, increasing running cadence decreases the vertical loading rate, loading time, and overall strain in the body.

How do I measure cadence?

Easy! If you have a GPS watch, there is a setting for cadence (most watches these days) that you can select to show on your display screen while running.

If you do not have a GPS watch with that function, then use a timer and count your steps to get your cadence as follows: count the number of steps you take for 20 seconds. Take that number and multiply by 3 to get your steps per minute. To make the math easier, count every time the same foot touches the ground to get the number of strides you take. Multiply by 3 to get strides per minute (85-95 strides is the goal).

How long will it take to run naturally with a faster cadence?

It can take 3-6 months before you are able to run at that range effortlessly. We recommend doing cadence drills twice a week. Do not over think your cadence and force yourself to run with a faster cadence every run. Increasing running cadence takes time and patience. Every 6 weeks, run 3 miles and try to keep the cadence elevated the entire run; remember what the average cadence was and try to increase it the next test run.

The only way I can get my cadence up is to run faster, is that normal?

That is very normal initially. However, with practice you will learn how to run with a faster cadence at all speeds! Technically you can “run” with a 170-190 cadence while not moving. What changes is the width of the steps when changing speed but the cadence should still fall into that range. Our advanced cadence drills help with this.

Beginning Drills

Cadence

Garmin Fenix with cadence option

No GPS watch- Run 20 seconds as you normally would, count your steps (or strides) for the next 20 seconds, then go back to your normal running for the last 20 seconds. Repeat 5 times

GPS watch- Set the display to show cadence, run for 1 minute working on getting your stride turn over quicker. Look at the watch periodically to see the cadence. Repeat 5 times.

RunTempo- Application for smartphones. It is a metronome that you can set a specific cadence. Every time you hear a “beep” your foot should hit the ground. If you know your cadence is let’s say 155, set RunTempo to 165 and run for 1 minute. Once you can easily match the cadence, bump up the cadence by 5 until you are in range. Once in the proper range, experiment by working at the different cadences 170-190 to see where you “feel” the best.

Advanced Drills

Cadence Test- Every 6 weeks, run a 5k and try to keep your cadence high the entire time. Make note of the average cadence after the run. Use that average cadence as your new benchmark for cadence drills. If you averaged 165, perform drills with the goal of 170 or 175. Repeat test and check again 6 weeks later.

Treadmill Roller Coaster– Once you can easily run in the 170-190 steps per minute range, now is the time to work on maintaining the cadence at different speeds. Set up a treadmill for 2 minute intervals. The first two minutes, set the treadmill to the slowest pace you can maintain your elevated cadence. For the next two minutes, bump up the pace to a tempo effort. The goal is to maintain the same cadence when switching from the slower pace to the quicker pace. What changes is the step width, but cadence should be the same! Repeat for 5-10 rounds.

Super Cadence Drills– Find a long gradual downhill. Run with a “as fast as possible” cadence on the way down for 1 minute. The goal is to get your cadence as fast as possible often reaching above 200 steps per minute. Repeat 5-10 times. I recommend this drill for triathletes to get there legs used to having a very quick turn over so when they run off the bike and their legs feel sluggish, what feels “slow” is actually still in the recommended cadence range due to the practice at running with an extremely high cadence.

There you have it, one of the easiest yet best ways to correct running form is increasing running cadence. If you are dealing with an injury, please get evaluated by a sports minded healthcare provider. At our Mission Valley sports injury clinic, we help countless runners overcome injury. Changing cadence while injured may result in worsening of symptoms so it is important to have a proper evaluation before making any significant changes to your workouts.


Peak Form Health Center

Please call 619-818-4306 or visit www.peakformhealthcenter.com to schedule!
2635 Camino del Rio South #200
San Diego, CA 92108

Running Doctor Running Injuries San Diego

Identifying and Treating Quadriceps Tendonitis

What Is Quadriceps Tendonitis?

Quadriceps tendonitis is the strain, irritation, or injury of the quadriceps muscle and tendons caused by either alignment issues or overuse of the knee. To explain the cause of pain and the best treatment, it is helpful to first understand the anatomy of the injured area.

The quadriceps muscle connects to the quadriceps tendon right above the knee cap, or patella bone, in which the tendon then stretches down to the patella and patellar tendon that then inserts into a bump right above the shin bone called the tibial tubercle. This quadriceps tendon, along with the patella and the patellar tendon, make up what is called the quadriceps mechanism.

The tightening of the quadriceps muscle then causes a pull on the quadriceps mechanism that forces the knee to straighten. This forced straightening leads to pain, weakness, and swelling of the joint.

Quadriceps tendonitis may be the result of various intrinsic and extrinsic factors. Some extrinsic factors include dangerous training regimens, like working out too intensely for long periods of time, or inappropriate workout settings and footwear. Possible intrinsic causes include misalignment of the foot, ankle, or leg, flexibility, age or weight. Any of these causes can lead to pain right above the patella bone when the knee is in use.

If you have been properly diagnosed with quadriceps tendonitis, the next step is non-surgical rehabilitation. This rehabilitation process includes a steady physical therapy regimen, and either rest or activity limitations until healed completely. To assist healing, icing and suggested pain medicine will help aid pain and inflammation. Massages also help loosen and heal the muscle.

Once the pain and inflammation have become more bearable, physical therapy will focus on gaining proper flexibility, strength and alignment around the knee joint to further assist the healing process and correct any muscle imbalance. Taping or bracing the injured area is often recommended to further aid in pain relief, as well as offer support to encourage the realignment process.

If you are having pain above your knee and think it may be caused by Quadriceps Tendonitis, don’t hesitate to reach out to Proform Sports Chiropractic so we can begin the healing process as soon as possible and get you back to doing what you love.

Runner's Knee Treatment San Diego

5 Pain-Fighting Exercises That Help Your Body Stay Strong

When the body is in pain, the first thing many people think to do is stretch that body part. This may provide temporary comfort, but it is not a long-term solution. In addition to stretching, there are many additional exercises you can do to help relieve pain throughout the body.

Check out some tips for relieving pain in these 5 spots:

Feet Pain

Towel curls are a great foot and toe strengthening exercise. This technique helps build the muscles that support the arch in the foot and is a helpful exercise for anyone experiencing plantar fasciitis.

To do towel curls lay a towel down on the floor in front of a chair. Sit in the chair with your feet flat on top of the towel. Using your toes, pinch the towel and pull it toward you. Try to use all the toes to scrunch up the towel. Release the towel and relax the toes. Repeat this exercise, doing 3 sets of 10 reps with each foot.

Neck Pain

Neck rolls help the spine and neck become strong and flexible. Lots of tension can be held in the shoulders, and that tension tends to lead to headaches or even migraines.

This exercise can be done sitting down or standing up. Begin with good posture and relaxed shoulders. Slowly tilt your head to the left, and then roll it forward across the chest until your head is tilted to the right. Continue to rotate your head around by doing 3 sets of 10 reps.

Knee Pain

Chair squats work all the stabilizer muscles in the legs, especially around the knees. This simple technique will build strong, stable knees.

Stand in front of a chair in the starting position: feet about hip-width apart. With the hands on the hips and the spine in line, bend the knees and slowly lower the body till your glutes touch the chair. Next, slowly come back up, always keeping your weight on your heels. Do 3 sets of 10 reps. To increase the difficulty, use a chair that sits lower.

Hip Pain

Hip bridges will help tighten and tone the hips, glutes, and ab muscles. This is a great exercise, especially if you sit in a chair all day for work. This technique will help activate those muscles after being in a relaxed position all day.

To get into starting position, get down on the floor with your back laid down on the ground. Bend the legs at a 45-degree angle, and keep your hands down by your side. Next, lift the hips up while squeezing the glutes and tightening the abs. When lifting and bringing down the hips, make sure to put pressure on the heels. Doing 2 sets of 10 will do the trick!

Shoulder Pain

Shoulder press exercises incorporate many muscle groups – the deltoids, triceps, and abdominal muscles. This is one of the best ways to help build and protect the shoulders. All you will need is a medicine ball or any heavy household object.

This upper-body exercise is best when standing, so the body can recruit the abdominal muscles. Stand with good posture, feet about hip-width apart, and hold the heavy object at chest height. While tightening the core, keep the back straight, and slowly lift the heavy object above the head until your arms are completely extended. Hold the object for a couple of seconds, and then slowly lower the object back down to chest level. Try 3 sets of 12 reps to start out.

5 Ways to Strengthen Weak Ankles and Prevent Ankle Injuries

Prevent Ankle Injuries: 5 Ways to Prevent Ankle Injuries

5 Ways to Prevent Ankle Injuries

Ankle injuries are one of the most common injuries among athletes. While it is impossible to completely prevent ankle injuries, taking precautionary measures before exercising can help limit the risks. Listed below are stretches to help strengthen and loosen up the muscles around the ankles. These exercises are great for both preventing injuries from happening and helping you recover from an existing injury:

  1. Peroneal Stretches

    One of the most important muscles to strengthen during any recovery or prevention of an ankle sprain is the peroneal muscle. These muscles extend from the top of the knee all the way down to where they attach at the bottom of the foot.

    The exercise is easy: Gently roll onto the outside of your feet and walk around for 60 seconds. This helps strengthen your ankle muscles and gives them additional flexibility.

  2. Ankle Circles

    This simple exercise will help strengthen the muscles in and around the ankle, improving the joints stability. You can either sit on a chair or stand for this conditioning.

    Extend your leg straight out, without bending the knee. Rotate your foot clockwise 10 to 20 times, rest leg for 5 seconds, and raise it again to rotate counterclockwise 10 to 20 times. Alternate legs and do 3 or 4 sets per side.

  3. Dorsiflexion Stretches

    The Dorsiflexion stretch is crucial amongst runners. This stretch is responsible for strengthening the muscles that run along the shin of the leg, called the Anterior Tibialis. This muscle is what controls the up and down movements of the toes. Therefore, strengthening this muscle will not only help prevent shin splints, but can also help protect the muscles and tendons in the ankle.

    First, sit on the floor with your right leg straight out and the left leg crossed, with the sole of your left foot resting against the inside of your right leg. Place a towel or band around the ball of the right foot and gently pull your toes back toward you. Hold for 15 seconds, repeat the stretch 4 times, and then switch legs.

  4. Write the Alphabet

    This exercise is as easy as reciting the alphabet! All you are doing is tracing every letter of the alphabet with your big toe. This exercise is best if you are seated in a chair.

    Hold your right leg straight out in front. Using your big toe as the “pen”, first write each letter of the alphabet in all capital letters. The same process again with lower case letters, then switch feet and repeat. Writing the alphabet is a challenging exercise that will help strengthen both of your ankles!

  5. Achilles Stretches

    Rupturing the Achilles tendon can set you back for quite a while. By doing regular Achilles stretches, you can help limit the risk of rupturing the tendon and help improve flexibility.

    From a standing position, bend the knee of your left leg at a 45 degree angle. Step the right leg back and keep it straight. Ground the heel of your right foot and push the hips forward. Hold this position for 15 to 30 seconds and then switch legs, repeating 2 to 4 sets on each leg.

Athletes at Risk

At our Mission Valley Office, we see many athletes with injured ankles including: ballet dancers, MMA fighters, soccer players, baseball players, and foot ball players. It is important to perform the above mentioned exercises to help prevent ankle injuries. If you are currently experiencing an injury to the ankle, please schedule with our certified sports chiropractors today!

ACL Injuries, ACL Prevention, and What It Means For Athletes

ACL Injuries, ACL Prevention, and What It Means For Athletes

ACL Injuries, ACL Prevention, and What It Means For Athletes

The anterior cruciate ligament, also known as the ACL, is a ligament that is located in the center of the knee. The ACL stabilizes and prevents the bones from moving in directions that the knee should not go.

What Is The ACL and Results of an ACL Injury?

The ACL is the most commonly injured ligament in the knee. It is estimated that in the United States, there are over 250,000 ACL injuries per year. More than half of these injuries occur in athletes 15 to 20 years old. The ACL tears from a person planting their foot, stopping, and their weight shifting the opposite way very quickly. The weight going one way and the leg going another tears the ACL.

Lots of athletes see ACL injuries as the end of their career because the recovery period is long and strenuous. It involves surgical reconstruction of the knee and many months of physical therapy to follow.

How Do You Prevent ACL Injuries

This begs the question, how do you prevent yourself from injuring your ACL? The only real way to avoid ACL injuries is to avoid activities altogether – but realistically; it’s nearly impossible to do that! Luckily, there are ways to minimize the risk of ACL injuries with the proper movement techniques.

Research shows that up to 88% of ACL injuries can be prevented with the proper education, stretching, strengthening, and agility courses. Train your body to have a stable center of gravity and a strong core, and try to maintain your core strength and flexibility. You may consider taking up yoga to build your core and balance, and it works well as a way to stretch.

It is also important to have enough strength that the knees do not buckle down when the athlete lands. By strengthening the knees and legs, the whole body will take the stress of landing instead of buckling down under the knees.